November 23, 2003
The right main Spar is all primed (see page on Priming) and ready for reassembly and riveting. The spar was put back together with #8 screws, washers and nuts placed at each rib location. This does two things. #1. It helps keep the spar capstrips tight and properly located. #2 It prevents me from accidentally putting a rivet in there before putting the rib attach angles in place.
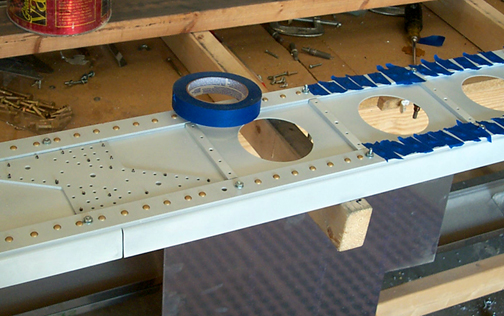
Once all of the capstrips were in their proper places, a rivet of the correct length was placed in every hole and taped down to prevent it from being vibrating out during riveting:
The proper length rivets must be inserted according to how many capstrip layers there are. The rivet length is correct when 1.5 times the diameter of the rivet is sticking out of the hole before the rivet is set.
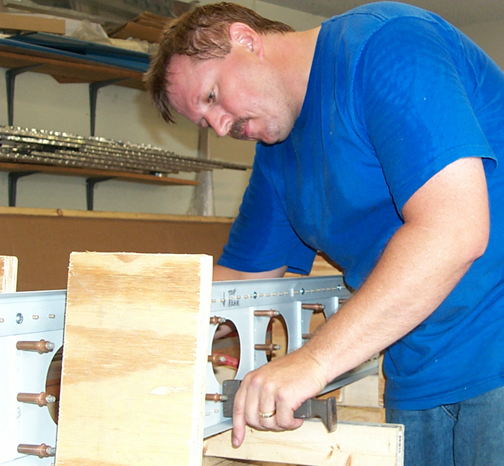
After all of the rivets were taped in place, the spar was placed so easy access could be had to both sides for riveting/bucking. I got this idea from Russ Erb's excellent CD (you have bought one by now I hope!) By standing the spar on edge, as shown below, the riveting can be a one man job:
Here is my technique for driving the spar rivets:
Once all of the 5/32 capstrip rivets (#5 rivets) were driven, it was time to drive the #4 rivets at the splice plates and the root. It is extremely important to run the correct air line pressure. DO NOT use the air pressure that was used for the larger #5 rivets, or the manufactured head will come smooshing out of the rivet set and flatten.
Note: While loading the above picture,
I saw a mistake that I made. The more observant of you will have
undoubtedly spotted it too. There is a rib attach angle (and spacer
bar) that goes on the row of rivets directly under the temporary #8
screw you can see in the upper capstrip. I filled the holes in that
row with rivets. Oh well, I have 4 rivets to drill out
tomorrow.
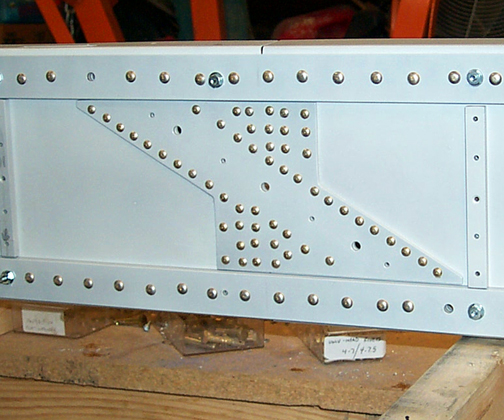
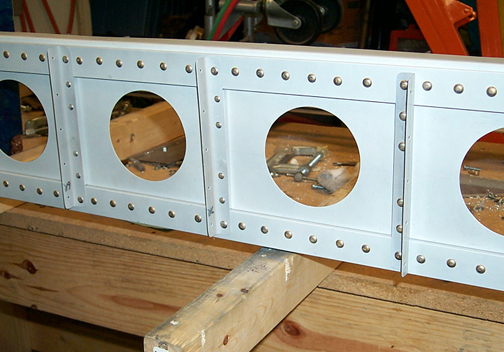
Well, the right wing Spar turned out real nice. I'm very pleased with the results. There are two or three rivets with small smiley faces on the head, but I am going to leave them in. Often times, you have to decide if removing the rivet (especially these 5/32" ones) would cause more damage than just leaving in an occasional one with minor imperfections. Out of over 250 rivets, I only have three that are not perfect and those imperfections are very minor.
The left wing Spar was completed next using all the same techniques as for the right wing spar. Everything on the left Spar was the reverse of the right Spar so I paid particular attention to getting it right. Here are the two completed main wing spars:
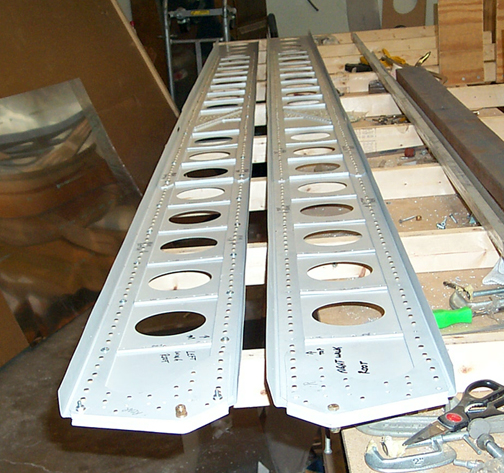
All that's left to do on these is to rivet on the rib attach angles. This was completed as outlined on the Rib attach angle page.
That's it for the main spars. A lot of work but doing it as outlined on these pages resulted in two perfectly straight main spars. I check fitted a couple of the ribs and they fit great. Now its on to the Rear Spars.
Main Spars
Completed: December 12, 2003
Total Time: 119.5 hours (includes making and fitting the rib attach angles and prep for prime and priming)
Click here to go to the Rear Spars page
Click here to go back to Spars page 4