November 15, 2003
With all of the capstrips and spacer bars drilled to the spar its time to start on the center splice plates. The splice plates must be accurately located on both sides of the spar. Once the splice plates were properly located and clamped, some of the #30 holes were drilled through the spar web and the splice plate on the other side, then clecoed in place:
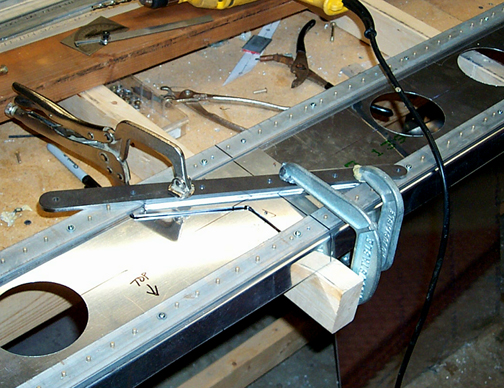
Once this was done, the strut attach spacer plates were made using the full size drawings and the centerline was transferred from the drawings. In the picture below, the spacer plate is in place, lined up properly, clamped and being drilled for the 4 flush rivets that will hold it in place.
The final thing that must be done before taking this all apart and priming it before riveting, is to drill the 1/4" holes for the steel strut attach bars. I want to get these holes drilled and cleaned up so I can get them nicely deburred between all of the capstrips before riveting.
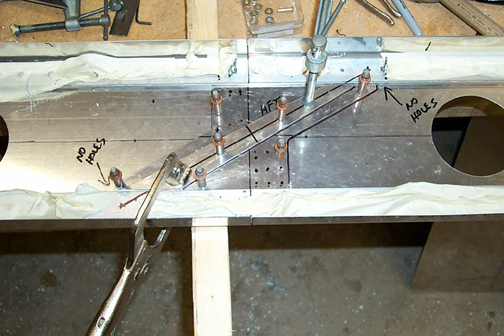
The best way to properly locate these holes, is to actually make the steel strut attach bars and use one of them as a drill guide to match drill the spar.
The strut attach bar was clamped in place with the spacer plates in place. The spacer plates were properly positioned by placing some flush rivets in the holes after they were countersunk. Here is everything ready for drilling:
Again, the Makita drill with the built in level was used to assure that these holes were drilled perfectly perpendicular to the spar. After each hole was drilled to 1/4", a bolt was slipped in before moving on to the next hole.
Once prepared, the parts received the full cleaning, Alodine treatment, and 2 stage epoxy primer as outlined in the page on priming.
Click here to go to Spars page 5
Click here to go back to Spars page 3