
The bottom skin is one long piece that runs from center rib #5 all the way out to the tip rib. It requires about a 10' long sheet. Again, the skin was clamped in place and reaching through the lightening holes in the rear spar, the ribs were traced onto the skin with a felt Sharpie marker. The skin was removed, rivet lines were drawn at the center of each rib and the spacing was set at 1 1/2". The rivet holes were then pre-drilled (but not the spar rivets yet). Also, to ease the installation a bit, the inspection holes were rough cut in place.
Here is the bottom skin hanging in place and ready for drilling the skin to the ribs:
The top skins overlap the bottom skins at the spar. On mine, I placed the top skins to overlap the bottom skin rather than the other way around. I figure this is probably a little cleaner aerodynamically.
With the bottom skin in place and the top skin overlapping, the spar rivets were drilled through the top and bottom skins and into the spar flange.
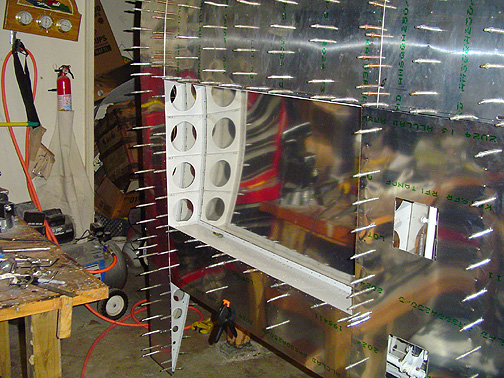
Next, the bottom skin that is just aft of the fuel tank bay was drilled in place. Make sure you leave enough extra hanging behind the rear spar. The skin needs extend about 3" behind the rear spar where the flap will be (on both top and bottom).
Here is a picture of the wing root area and fuel tank bay.
Here is what the top of the wing looks like at this point:
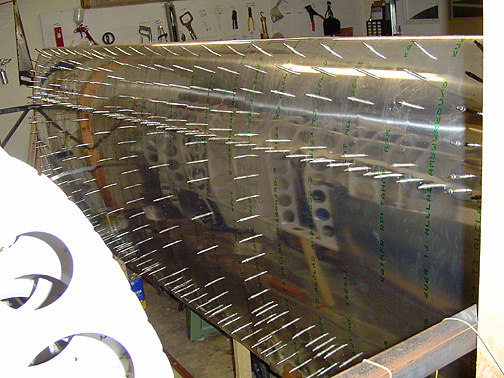
Looks like I'm almost done right? Wrong!!!! There is still a lot of work to do before rivet gun meets rivet on this wing. You can sort of of see the other wing skeleton on the lower left side of the above picture. My original intent was to skin both wings before riveting. I quickly found out that my 500 or so clecos was not going to be enough. In fact, I ended up going back and taking out clecos, only leaving one in every 3rd hole, just to be able to finish up the one wing.
The bottom skin needs some inspection holes with covers so you can access things later after the skins are riveted in place. For my wings, I can get by with 6 total. Here is where they are:

Some builders put them at the outer aileron hinge and flap hinge locations and at the root flap drive. I can access all of those through lightening holes so I really didn't see a need for them in my application. I will cut a small hole for the grease fitting at the root flap torque tube support.
Now, with the skins all drilled on, its time for the detail work. The first thing I want to do is fit and drill all of the inspection covers.
The first thing to determine is how large of hole is needed for each location. The answer is . . . ready for this? drum roll . . . . the answer is IT DEPENDS! It depends on the purpose of the hole. Is it there just to inspect things at the annual or will you need to get tools in there and work? How big are your hands? Big? You need a larger hole.
Fellow builder Pat Fagan came up with a great idea. Before cutting any holes in aluminum, he fitted a piece of cardboard to the wing ribs then cut what he though were the right sized inspection holes. Then, using some actual tools he reached in and tried working. The holes were gradually enlarged in the cardboard until he could perform whatever operation he was trying to do. Now using that information, he made his inspection holes.
I found that for most of mine, a 4 1/2" square hole was enough. Keep in mind that you will have a support ring riveted inside the hole that takes up 1" so for a 4 1/2" hole (net), you need to start with 5 1/2" hole in your wing skin. At the Aileron Bellcrank, I doubled the width, spanning across the rib, because I have to deal with a turnbuckle including safety wiring it at that location.
Click here to go to Wing Skinning page 3
Click here to go back to Wing Skinning page 1
Click here to go to the Wings Index page
Click here to go to the Home Page