Firewall page 1

Started 03/01/06

The firewall is made from a sheet of stainless steel.  This is a very important part of your airplane because it keeps the smoke, fumes and, God forbid, any fires out of the cockpit. It's made out of stainless steel instead of aluminum to better withstand any heat.

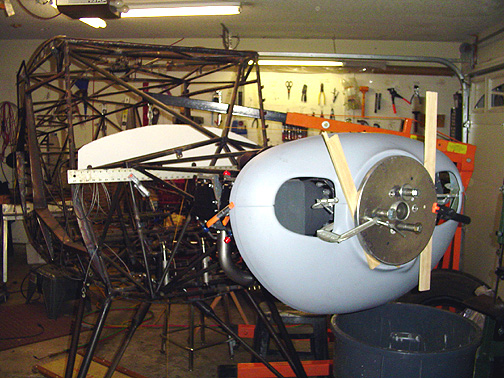
The firewall must be properly shaped and sized as it defines the shape of the fuselage as it progresses from the spinner and nose bowl, back to the instrument panel on top, and door frames on the sides.  To make sure the firewall is the correct shape and size, you must first mount the engine so you can mount the prop spinner and nose bowl.  You must also mount the instrument panel (or at least a mock up of it).

The nose bowl was temporarily clamped into position using some 1/4" pieces 
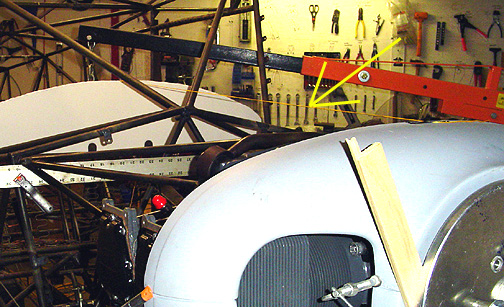
of wood as spacers between the spinner plate and the nosebowl.

Then a string was ran from the top of the nose bowl to the top of the instrument panel as shown below:
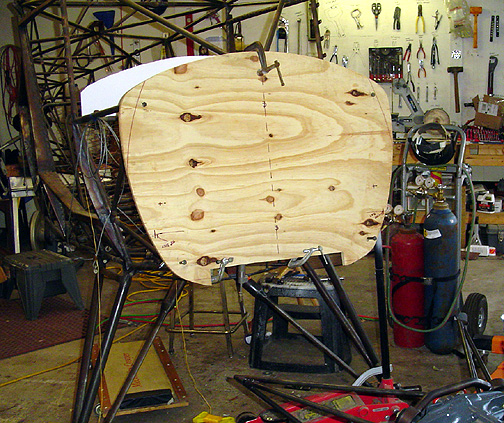
A measurement was then taken from the corner engine mount holes to the string:

The distance was exactly 6 1/2" as per the plans.

The final check is the width.  The string was moved to the side of the nose bowl and the forward door flange as shown below.  The 48" long ruler was clamped into position with the 20" mark centered on the fuselage centerline.

The string perfectly aligned with the 40" mark on the ruler.  Again, just like the plans.  Therefore, since it all lines up as per the plans, I'll simply make my firewall the same exact size as shown on drawing #18.  If you have decided to make your instrument panel larger than the 9 1/2" shown in the plans, you will most likely need to alter the size of your firewall to achieve a nice straight line from the nose bowl back to the instrument panel.  

Russ Erb did an outstanding job of showing where all the radius lines are to make the firewall the correct shape and size.  The picture below was taken directly from Russ' excellent CD and is his rendition of the firewall curves and radius locations:

Once you have the above radius lines figured out, you can simply scale to the drawing for each and every curve.  The drawing is in a scale of 10:1  

The above measurements were transferred to a 3/4" thick piece of plywood and the shape was cut out using a jig saw.  The corners were radiused slightly.  Here is my plywood cut-out of the firewall being match drilled to the fuselage from behind:

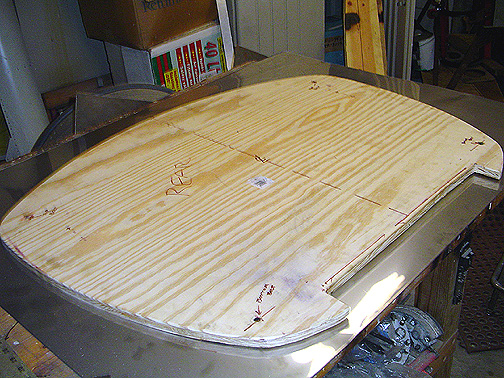
The plywood firewall form was then placed on top of the sheet of stainless steel and the outline was traced with a sharpie marker pen:

Click here to go to Firewall page 2

Click here to go Home