Started November 13, 2004
The same table that was used for the Horizontal Stabilizer, was again painted white, with cheap house paint, to eliminate the scorch marks and lines from the H.S. fabrication.
As before, a vertical line was drawn near the end of the table to represent the Fuselage centerline. From that line, another line was drawn perpendicular, using a large framing square. This line represents the elevator spar tube center line.
A third line was drawn exactly 59" from, and parallel to, the fuselage centerline. This line represents the tip end of the elevator.
With The H.S. in the proper position, the tip end rib of the H.S was traced onto the table top.
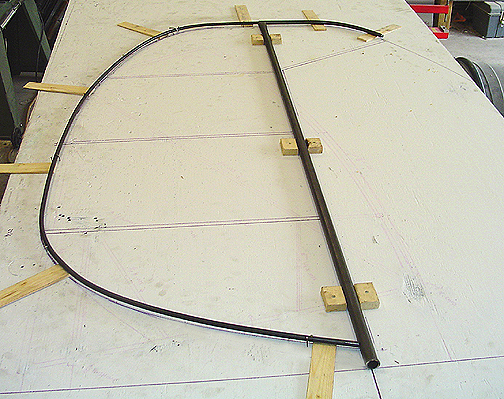
Now its time to start bending and fitting some tubing to the outline.
The trailing edge was made as all one piece, even though it will have a Trim Tab cut out later on. Once everything is properly lined up and blocked in place, the Trim Tab portion will be cut out.
The 3/8" tubing must end up centered on the 7/8" elevator spar. To do this, it must be raised 1/4" off the table. I found that the wood shims from Home Depot are exactly 1/4" on their fat end, so they were used as pictured below to hold the entire trailing edge tube at the proper height off the table top 1/4":
Click here to go to Elevator page 2
Click here to go to the Tail Index page
Click here to go to the Home Page