Wing/Fuselage Gap Fairing pg 1
Started February 2, 2008
The gap between the wing and fuselage is covered with some .032" aluminum
(2024T3). I started by doing the easy parts first. The gap where the
wing meets the fuselage runs parallel for a distance on top and bottom. So
these just require some strips of aluminum cut to the correct width and length.
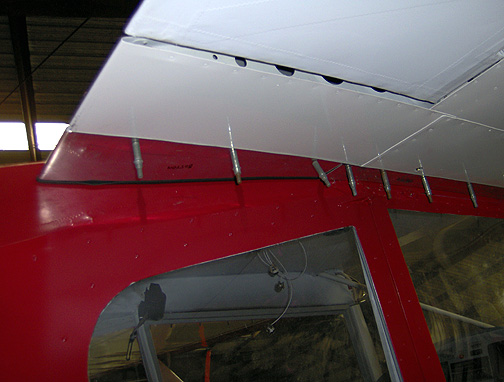
The top gap fairings are shown here:
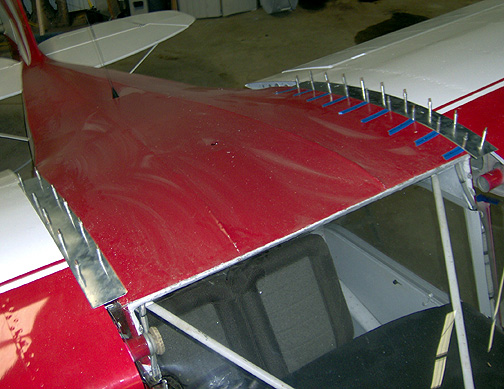
The blue tape that you see is trick that I use whenever I am drilling in
the blind and trying to hit something accurately underneath. In this case,
it was used to help me hit the center of the 1/2" steel wing former on the
fuselage when I drill the fairings to them. I put the tape on first,
then make a mark on the tape exactly 2" from the center of the former.
Then, when I place the aluminum fairing on top, I can measure exactly
2" from my mark and drill at the exact location, assuring that I will hit
the center of the steel former underneath every time.
The holes in the wing formers will be drilled and tapped to receive the #6-32
screws. The holes in the wing root rib will receive platenuts for #6-32
screws.
Next the underside of the wing/fuselage gap fairings were made, again just
running from the windshield to just aft of the flap pulley.
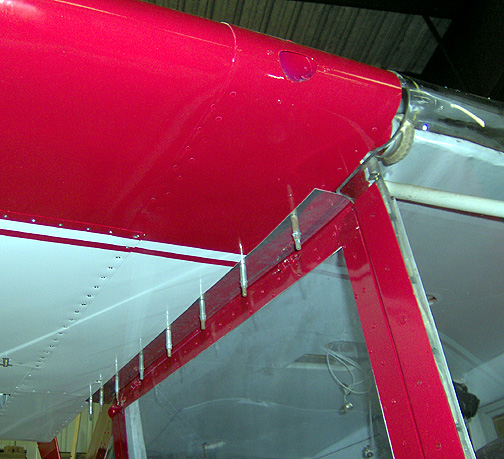
These are only attached to the wing root rib flange and butt up to the fuselage
side with some rubber channels to protect the fabric.
Next, the trailing edge piece was made. I noticed that on Proto 1 Bob
made this in two pieces and they met at the trailing edge of the wing. I
decided to make mine all one piece, covering the top and bottom.
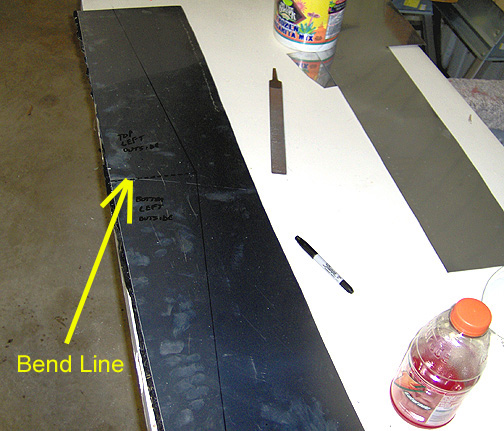
To get the correct fit, some poster board paper was used to make a template
for the top fairing and one for the bottom. These two templates were
then laid end-to-end on a piece of aluminum, with their trailing edges meeting
meeting in the middle, and they were traced onto it. The trailing edges
became the bend line for the piece and you want the edge that faces away
from the fuselage to be a straight line as shown below.
Here is the layout of the piece before trimming and forming:
This was cut out and the edges were smoothed. Then using a brake, the piece
was bent along the bend line shown above to match the trailing edge of the
wing. To get a nice fit, the radius of this piece should be slightly larger
that the radius of the wing trailing edge. The brake set-back was adjusted
to make the radius slightly larger.
After some repeated cutting, fitting and filing, the fairing was drilled
to the wing at the root rib flange:
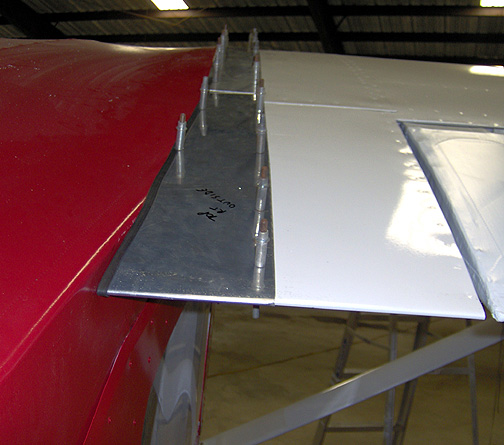
Note that the rubber channel is already in place. To look nice, the straight
edge should be a continuation of the strip fairings on the top and bottom..
Here is the underside:
The rubber seal was placed on the edge of the gap fairing while drilling
the holes.
Click here to go to Wing/Fuselage Gap Fairings page
2