
As previously stated, I bought the parts and kits for the wingtip lights
from Creativair. The LED nav light
comes as either a kit that you have to solder together, or you can purchase
them completely built for you. In the spirit of homebuilt aircraft (and saving
some money), I went with the kit version. Here I am soldering all of
the little resisters to the circuit board:
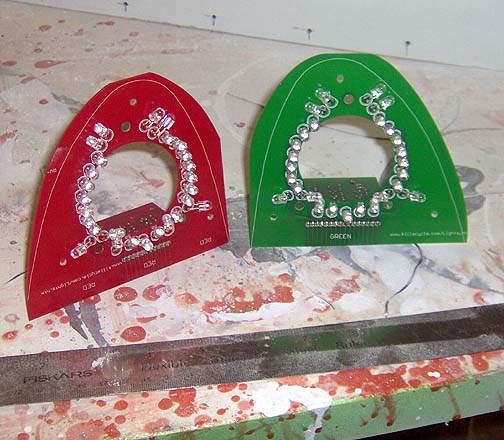
Here are the completed LED Nav light assemblies:
This shows what the back of one of the LED circuit board looks like:
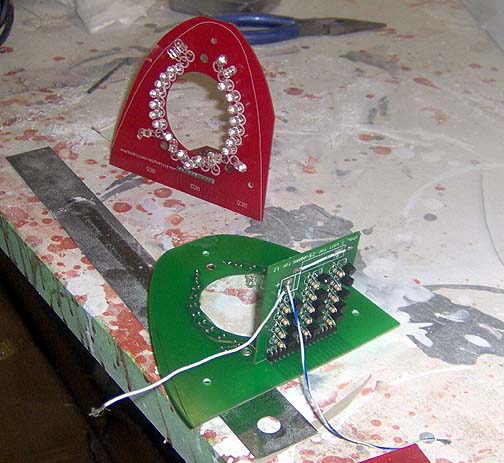
Note all of the resisters and current regulators. Not as complicated
as it looks. The instructions that come with the kit are very well
written and easy to follow.
The next part of the install is the landing lights. The landing lights
are 75 watt halogen lights, which are very bright. The landing lights
kit comes with long screws and springs. They attach right to the LED
Nav light boards, as shown here (front and side views):
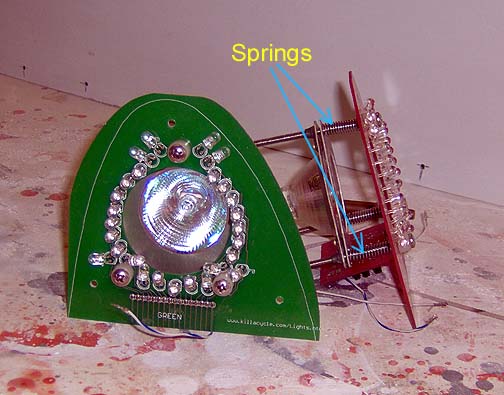
The landing lights adjust much like automotive headlights, turn one of the
three screws and the light tilts, to aim in whichever direction that you
desire. These will be final adjusted after the wings are mounted on
the fuselage.
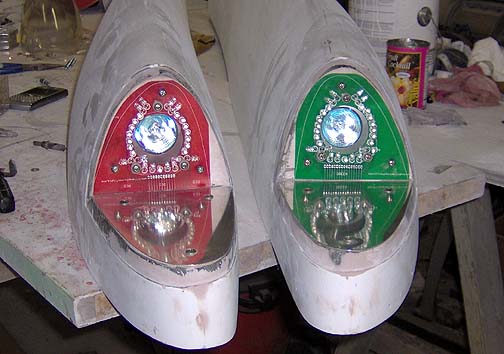
Next, holes were cut in the wingtip light area back wall to accommodate these
units, so they slip in from the front. The unit is attached to the wall with
#8 screws and platenuts. Here are LED nav / landing light assemblies mounted
to the wingtips:
Note that I also made up some aluminum reflectors for the other wall.
These were made from .032 aluminum sheet.
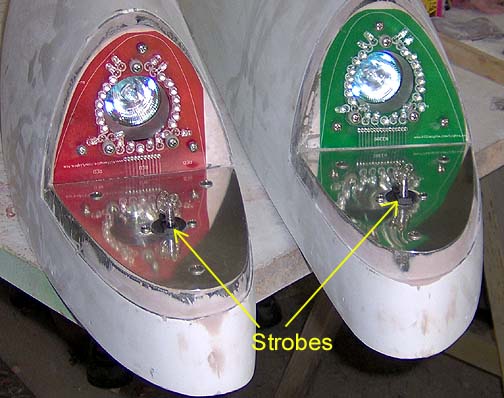
On the side wall (with the aluminum reflector), I mounted a strobe light.
To mount the strobe lights, I simply found the center of the wall and
then drilled a 1" hole with a hole saw. The strobe head was inserted the
hole and the two screws holes that hold it in place, were match drilled to
the wingtip side wall (and aluminum reflector). Here are the wingtip
lights with the strobes installed:
Here are the wingtip lights with the lenses in place:
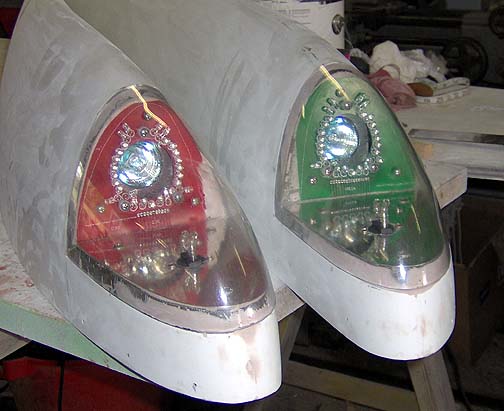
The lenses were drilled in four places to the flange of the wingtip light area, and then platenuts were installed on the inside of the flange to accommodate #8 screws.
Click here to go to Wingtips page 5