Started January 2, 2007
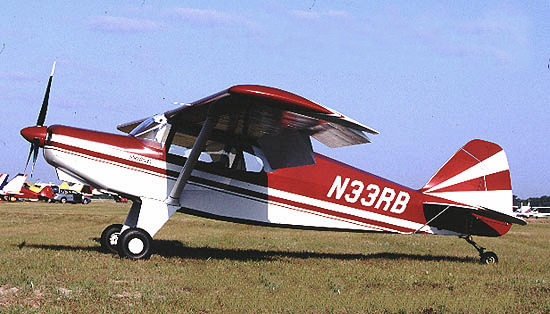
My planned paint scheme is the standard Bearhawk Red/White like the prototypes are painted. The layout and measurements for the stripe pattern are found in the November 2001 Bear-Traks newsletter. My color choices are Poly Fiber's Insignia White and Pontiac Red.
Some builders are using Aerothane for a high gloss look, but I have chosen to go with Poly Tone. I'm looking for the more traditional look of a fabric airplane. I'll compound polish the Poly Tone paint with a polishing wheel later and will get a fairly good glossy shine but without having to worry about a fresh air respirator. The Poly Tone also allows for easier repairs, should I need to do that later. Poly Tone will be used on the entire fuselage including the doors and cowl (after Epoxy Priming with EP420). The wings will be Epoxy Primed with EP 420 then top coated with Poly Fiber Enamel (with hardener) in matching colors.
Preparation is the key to a great paint job. Taking your time and getting out every flaw you can find now, will pay off later with a nice looking paint job.
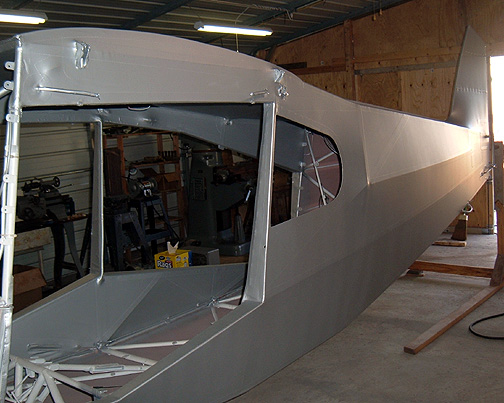
Once the first 2 cross coats of Poly Spray were applied over a 2 day period, the whole thing was thoroughly wet sanded being careful to not rub completely through to the fabric. Once you reach pink, stop sanding.
A final cross coat was put on and some touch up sanding was needed here and there. Finally one more cross coat just to make sure that the Poly Spray that was taken off during sanding, was replaced.
Here is the fuselage ready for paint:
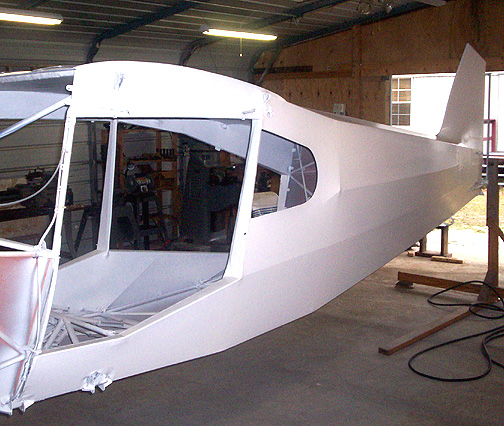
Now for the white paint. The entire fuselage was first wiped down with the Poly paint prep and then tack clothed. Poly Tone Insignia White was then applied as per the Poly Fiber system instructions. It is best to spray everything white, including the areas where it will be Red. The white base coat gives all other colors a brighter appearance.
I found the Poly Tone very easy to apply. I would encourage anyone to paint your own airplane. With Poly Tone its no big deal - really!
Here is the fuselage with 3 coats of Insignia White Poly Tone applied:
Now we can lay out the first stripe. In a study of the pictures of the prototype Bearhawks I see the top white stripe (3 1/2" wide) runs from the center of the intake hole of the nosebowl back to the bottom of the tailpost. The top of that stripe aligns with the bottom of the rudder. To center the stripe on the nose bowl inlet, I measured from the centerline of the inlet up 1 3/4" (since the stripe is 3 1/2" wide) and made a mark.
A heavy piece of string was stretched from that mark on the nose bowl back to the tailpost and aligned with the bottom of the rudder. Using a pencil, several reference marks were made along the string line.
With the first strip laid out , the remaining stripes could be measured out (see November 2001 Bear-Traks for dimensions) and marked at each reference mark.
I used 1/2" Fineline tape for masking off the stripes. It's a bit more
expensive than regular masking tape but the crisp, clean lines it makes are
worth it. Here is a picture of the masked strips down the side of the
fuselage:
Paper will be hung from the bottom stripe down to preserve the white paint
on the bottom.
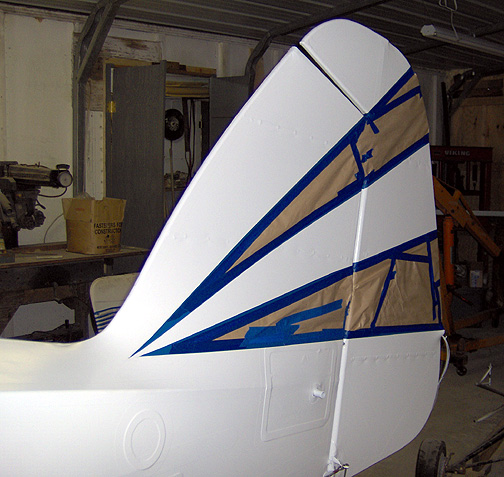
The starburst on the tail was also laid out and masked off:
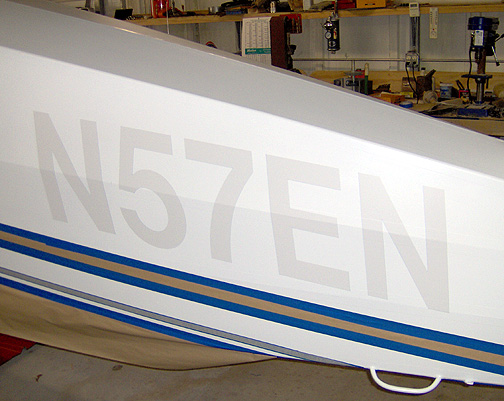
Here are the "N" number stencils in place:
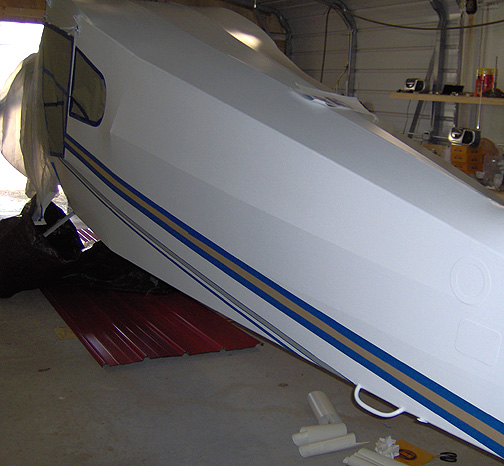
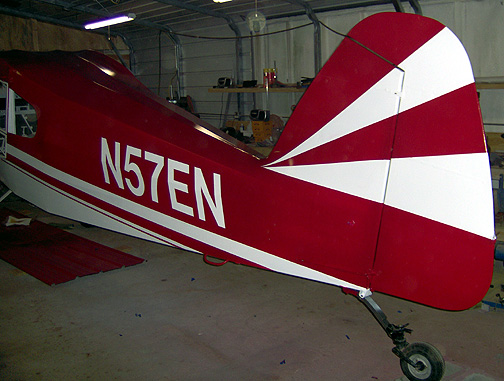
OK, it's time to put some Red paint on. Since the white paint has been on for a little over a week, the Poly Fiber book recommends cleaning it thoroughly and then spraying a mist coat of 100% thinner on first, to soften the white paint and prepare for the Red.
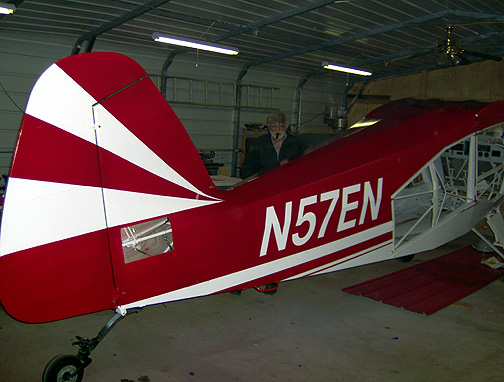
I am very happy with the results. Here are some pictures:
Here you can see why the cargo door kind of limits your "N" number
location:
I guess you could let the "N" number go onto the cargo door but it would
be a bit more complicated.