
As you can see in the above picture, the baggage compartment floorboard has already been fitted and installed.
Started October 11, 2006
The floors on the Bearhawk can be made from aluminum or light plywood. I believe that aluminum is the lightest and most durable. It's also what is in both prototypes so I will go with that. Like in the prototypes, I'll go with 2024 T3 aluminum sheet, .032" thick.
The easiest way to make the floorboards is to start with a posterboard template, then trace the template onto the aluminum sheet. Then cut out the aluminum, and final fit it to the fuselage. Like all aluminum, the edges should be thoroughly de-burred and smoothed to a satin finish.
Here is my Father-in-Law and building partner Lonnie Gibbons doing some
final fitting of the posterboard template to one of the sections where
the floorboard will go:
As you can see in the above picture, the baggage compartment floorboard has
already been fitted and installed.
The floorboards were cut to fit tightly around any tubes or cable fairleads
that are in the way. They were also cut to lay on the bottom longerons
and cover exactly 1/2 of the tube as shown below:
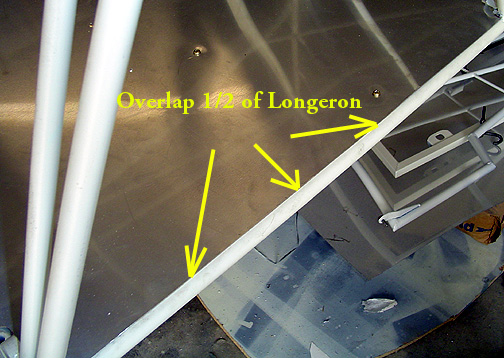
The inside of the cabin will be fabric covered. The fabric will
wrap around the outside of the bottom longeron.
We started at the aft end of the cabin area and worked our way forward to
the firewall. As we went, each floorboard piece was back-drilled through
the tabs that were previously welded on. After deburring,
the tabs received a monadnock clip and the floorboards were screwed in
place:
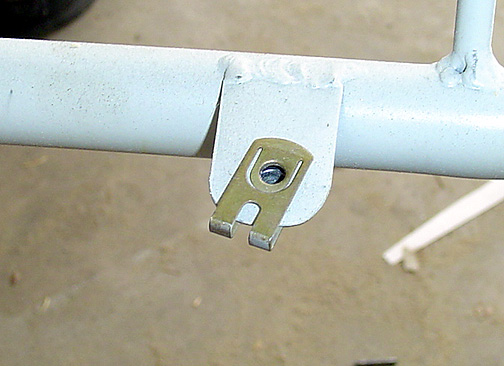
This system is much easier than installing platenuts and takes a lot less
time.
The floorboards were one piece for each station from the baggage area to
under the rear seat. Once we got to the area under the front seats
we made them in two pieces, left and right, creating a 4" tunnel in between
as shown below:
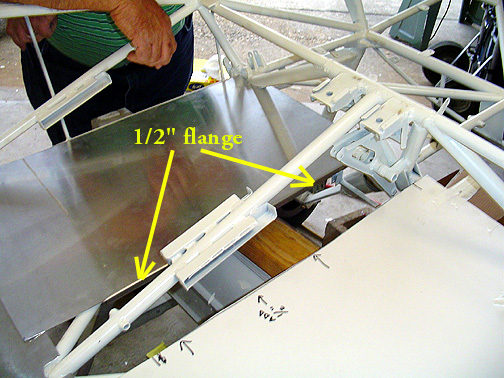
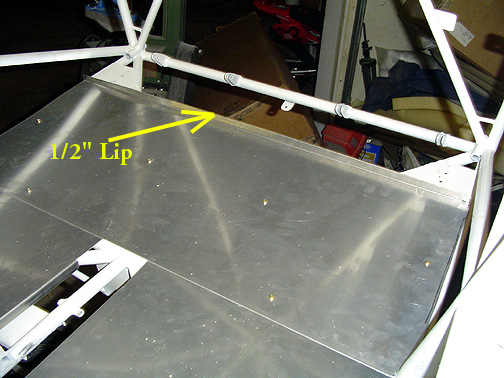
On the right, you can see the paper template has been created with a reminder
drawn on to create a 1/2" flange. On the left side you can see the
finished floorboard with a 1/2" stiffening flange. Later, we will make
a cover to span the tunnel. Creating a tunnel as shown, makes it easier
at inspection time to access the elevator bell crank and gang pulley area
to make sure everything is looking good. Its easier to remove the cover
than the entire floorboard.
Here is the floorboard in the flap handle area. Again these are split
into two floorboards with a tunnel in
between:
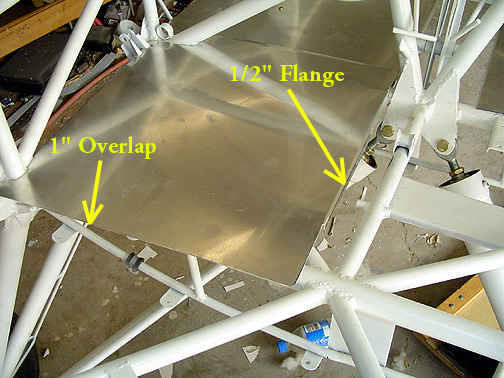
Note that again there is a 1/2" flange for stiffening purposes and as in
all floorboards, there is a 1" overlap.
Here is both sides showing the 2" wide tunnel:
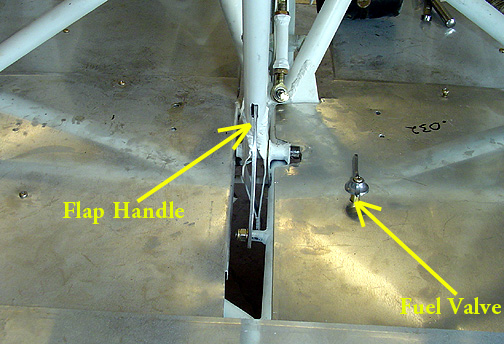
Note the fuel valve has been installed as well as the flap handle to check
for clearances. Also note that the pilot's side floorboard is cut to fit
over the center tube under the flap handle mount.
The final floorboard is the one that runs up to the rudder pedals:
Note that the floorboard ends just short of the rudder pedal mounts and
has a 1/2" flange to keep pencils and pens from rolling up under the floor.
Now we will create some covers to go over the tunnels.
Click here to go to Floorboards page 2
Clcik here to go to the Fuselage Index
page