Here is the side channel at the firewall, also attached with a steel strip,
to allow it to sit flush:
Since the clecos that are temporarily holding the boot cowl on would
cause an interference problem with the engine cowl skin, the boot cowl was
temporarily pop riveted in place using all aluminum (both the rivet and the
mandrel is aluminum) pop rivets. These are extremely easy to drill
out, so they make a great way to temporarily hold things. The heads
protrude very slightly so they were sanded down flat with an air sander (or
they can be filed):

I'm not worried about the sanding scratches on the skin since I have to scuff
up the aluminum anyway when I paint it anyway. This gives you a good way
to temporarily hold the "C" channels as well as the boot cowl skin in place
while you fit the engine cowling skins.
Now, with the four channels in place, we can start skinning the engine cowl.
The first skin installed was the top center skin:

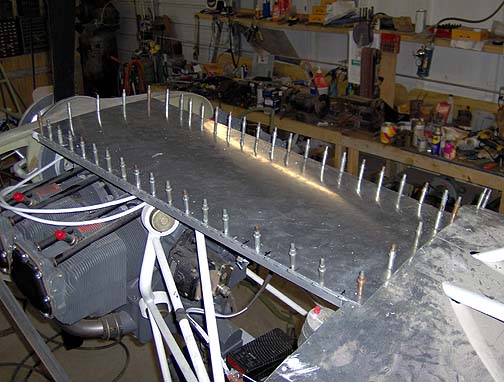
The 36" long hinges are drilled along with skin. I used 2" spacing
for this application. The hinge is facing downward which hides the hinge
but only allows the door to be opened a little bit past 90 degrees. Russ
Erb turn the hinges face up, which exposes the hinge above the cowl skin
but allows him to open the cowl doors all the way back and let them lay all
the way down when open. Builder's choice on this one and both approaches
are excellent.
The bottom skin of the engine cowl was fitted next. I decided to go with a split skin for the bottom cowl with a seam down the middle. This will make fitting the bottom cowl skin much easier. Since there is a tunnel on the bottom for the carb air box, only about 6" of the seam with show anyway.
To fit the skin to the nose bowl and firewall, it was first clamped to the side channel and four location holes were drilled through the skin and into the channel. The skin could then be clecoed in place in a repeatable fashion and always be located in exactly the same spot each time. This is important since you will be putting it on and taking it off numerous times while cutting the skin, to properly fit the nose bowl, the firewall and around the carburetor.
After getting a fairly good fit but leaving an extra inch or so at the nose
bowl and firewall, the skin was pre-bent to match the curve of the firewall
and nose bowl. There is a fairly sharpe curve at the bottom of the firewall.
This location was marked on the skin and then some special attention
was given to this area when rolling the cowl skin. Here is the method
that we used to form these bottom skins:

As you can see, we clamped a couple of 1 x 6 boards on the skin to give us
a nice way to hold it flat while shaping the curve into it.
Once it was shaped, the skin was clecoed back in place to the side channel. Then with everything held up nice and snug at the firewall and nose bowl, I reached inside and traced the nose bowl and firewall shape onto the inside of the skin. The skin was removed and a line was drawn exactly 3/4" out from the traced line at the nose bowl end. This is the width of the flange on the nose bowl. We added 1" overlap at the firewall end. The skin was then final trimmed and edges were filed smooth.
The skin was then reinstalled and drilled (with 3" spacing) and clecoed to the nose bowl and boot cowl, being careful to measure and hit the center of the flanges.
Here is the left side, bottom cowl skin at this point:

For now the white protective plastic was left on the aluminum skin to protect
it from scratches.
At this point the skin is about 2" past the fuselage center line on the bottom.
The right bottom skin was made in exactly the same way and overlaps the left
side skin at the bottom:
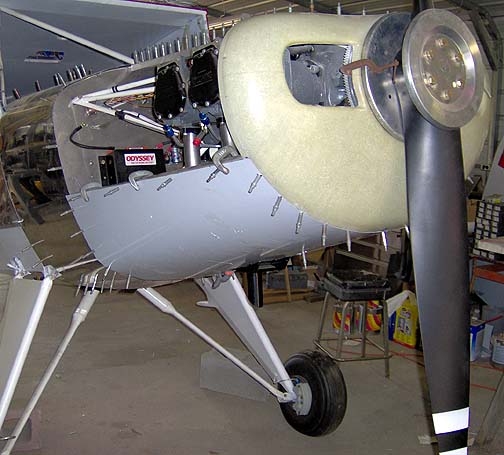
Where the two skins meet on the bottom center, I cut them to create a 1 1/2" overlap and will create a double row of rivets, 1" apart at the seam. The airbox cover and the channel at the aft end of the cowl opening will also hold the two cowl halves together.
Now for our next challenge.
While taking a break, I was sitting at the front of the airplane admiring our handiwork when I noticed something. The carburetor airbox is offset about 2" to the left of the airplane centerline! Nothing we did wrong, its just the way the engine is made and how the carburetor is mounted to it, but it's definitely off center to the pilot's side. Go to the next page to see what we did to fix it.