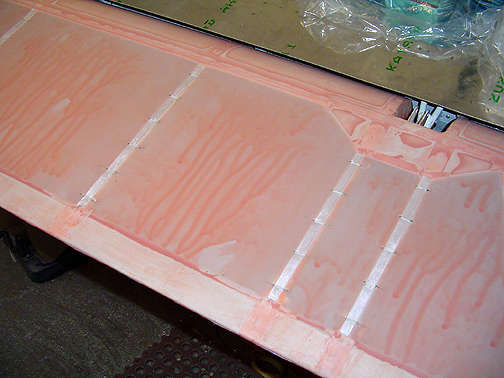
Now its time for the rib lacing. Special Rib Lacing Reinforcement Tape, the same width as the ribs (1/2") is stuck down first. On the video, a modified hidden seine knot is demonstrated. With this method, you get a very clean looking installation with all knots being hidden under the fabric. Here is a picture of the aileron after rib lacing:
I used 2" spacing for the aileron and flaps as called for in the book. The minimum rib lace spacing is dependent on the Vne of the airplane and whether or not the control is within the prop wash area. 2" spacing works fine for the Bearhawk. The rib lace closest to the ends of the ribs must be 1/2 the minimum spacing (1" in our case).
I found that shining a light up through from the bottom helped quite a bit in locating the 12" long needle as it was pushed through from top to bottom.
To learn the proper knot tying technique, I probably viewed the video about a dozen times and still had to refer back to it a couple of times in the middle of the first few knots. Once I got it down, it was a piece of cake and I moved right along like an expert.
Now its time to put on some reinforcement strips and then spray on some Poly Spray to help protect the fabric from UV rays and prepare it for the final paint. The reinforcement strips are made from the same exact material as the covering process. These come in rolls of various widths and all edges are cut with pinking shears to give that ragged edge look that you see on practically all fabric covered airplanes. It's tradition.
The reinforcements strips must be applied over all ribs, anywhere where the fabric transitions from a hard surface to soft and over all seams (usually the leading and trailing edges. Its also applied over any protrusions, rivets, rib lacing, sharpe edges, etc.
Here is the flap with the reinforcing tape in place:
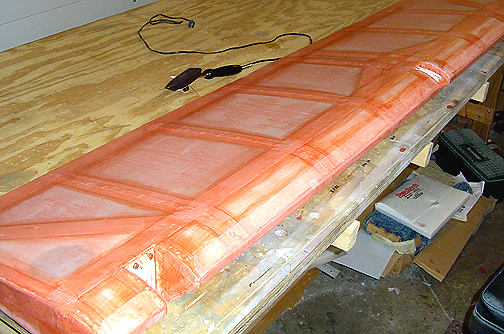
I used 2" wide tape over the ribs and transition from hard to soft areas. I used 3" bi-directional tape on the ends and in the hinge pockets because it readily forms around a corner. Finally, I used 4" tape along the trailing edge and along the leading edge.
In the above picture, you can see the small heating iron laying on the table. It was set to 225 degrees and all edges of all tapes were smoothed. Also, ant wrinkles or bubbles in the tapes were worked out with the iron. Its works very well as described on the video tape and in the Poly Fiber instruction book.
Once, everything was smoothed out, a couple of cross coats (one north/south and one east/west) of the pink poly brush was sprayed on, putting it on very wet to fill the weave of the fabric. Here is the flap after the cross coats of poly brush:
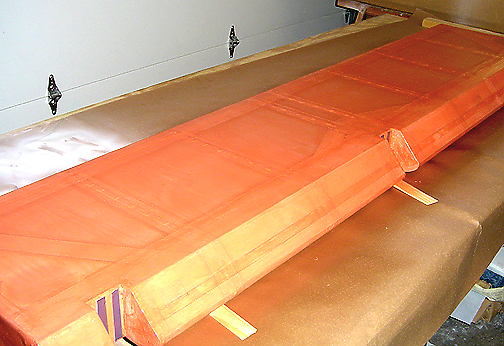
As you can see, I have removed the hinges at this point and put on some masking tape to protect the area where the hinges bolt up to.
The final steps involve spraying on the Poly Spray. Poly Spray contains an aluminum pigment that gives you a sandable finish. It also acts as a UV protection to keep the fabric safe from the damaging rays of the sun. The Poly spray acts as a filler of sorts to help make a smooth transition from reinforcement strips to fabric.
Here is the flap with 2 double cross coats of poly spray (silver):
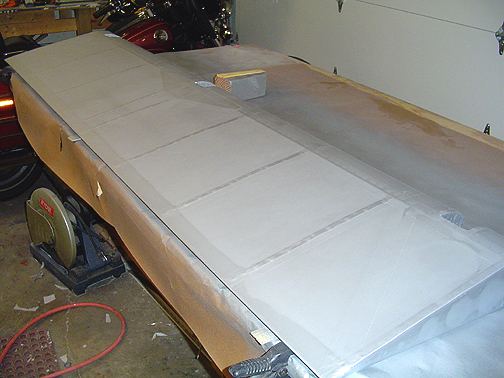
The flap will be allowed to dry overnight and then will be carefully wet sanded with some 400 grit wet or dry paper and water. It will then receive one final cross coat of Poly Spray.
I will leave the flaps and ailerons in the silver stage until after the test flying has been completed. Once all tweaking has been done, they will be final painted along with the rest of the airplane.
Covering Flaps/Ailerons
Completed: October 26, 2004
Total Time: 106 hours