
The ribs in the Horizontal and Vertical Stabilizers, as well as the Rudder and Elevators are called "T-25" ribs. The T-25 ribs are formed out of .032 steel plate (4130). These are the ribs that the fabric will later be rib laced to, so they must be smooth and the inside edges of their flanges must be turned down to avoid having an edge rubbing on the fabric.
To make the T-25 ribs, a piece of .032 steel was marked off to the proper width allowing for the web and 3/8" flanges and an extra 1/8" on each flange, which will be bent down (see later pictures). I subtracted 1/16" from the web measurement for bend allowance.
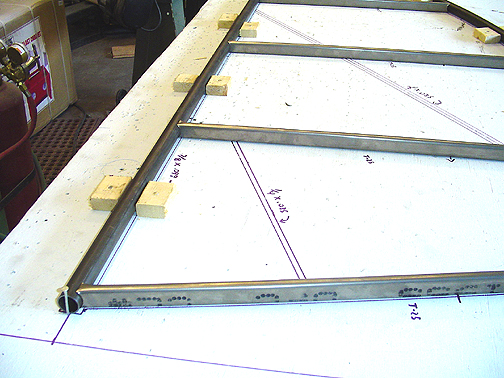
In the end, the ribs will be same size as the tube they will be welded to. For instance, the T-25 ribs in the Horizontal Stabilizer run from the leading edge tube which is 7/8" diameter to the aft tube of the stabilizer which is also 7/8" high. So they will simply be straight 7/8" high ribs. On the other hand, the T-25 ribs for the elevators and rudder attach to a 7/8" tube at the front and attach to a 3/8" tube at the trailing edge. Therefore, these ribs must start 7/8" tall and taper down to 3/8" at the other end.
There is currently (as of this writing) a shortage of 4130 "N" which is normalized steel plate in this country (USA). There is, however, an availability of 4130 "A" Annealled . I called Bob and asked about using 4130 "A" for the T-25 ribs and he approved it saying that 4130 "A" would be plenty strong enough for this particular application.
The following is how I made the Horizontal Stabilizer T-25 Ribs:
Here is the 4130 "A" steel plate measured and marked off for the Horizontal Stabilizer ribs (enough for both sides) and being cut into strips using a shear:
You will notice that all but two of these ribs have no taper. The T-25 ribs on the Horizontal Stab all start and end 7/8" because the leading edge tube and rear spar are both 7/8" tube. However, the end rib (outside edge) does taper from 7/8" down to 1/2" so you can see that the two strips on the left side of the above picture are tapered. The rib blanks were left a little long at this point.
Once the rib blanks are cut into strips the proper width and lengths and with cutouts made on each end, the next step is to bend them to 90 degrees to form a rib channel of the correct dimension. In our case, the channel must be 7/8" wide as measured on the outside of the rib. (If this were a rudder rib, it would be 7/8" on one end and taper down to 3/8" on the other end). This way when the rib is welded to the tube, there will be a nice smooth transition from tube to rib with no humps or low spots. This will show when the fabric is placed on so get the rib height the correct size, allowing for metal thickness and bend allowance.
Here is a Horizontal Stabilizer T-25 rib blank being bent in the 8' brake:
As you can see in the above picture, one flange has been bent and the other is getting ready to be bent to 90 degrees. As is good practice, a radius was created in the corners.
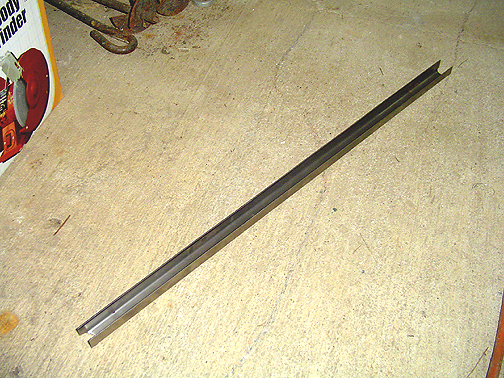
Here is the T-25 rib at this point. You can see the rounded ends from punching the holes with the 7/8" punch. These will nestle right into the stabilizer leading edge and aft spar tubes:
The final bit of business is to create an inside bend of about 30 degrees along the top 1/8" of the flanges. This will keep the fabric from being cut and also serves to stiffen the rib a bit more. This bend can't be done in a brake, so some sort of tool must be devised to do it.
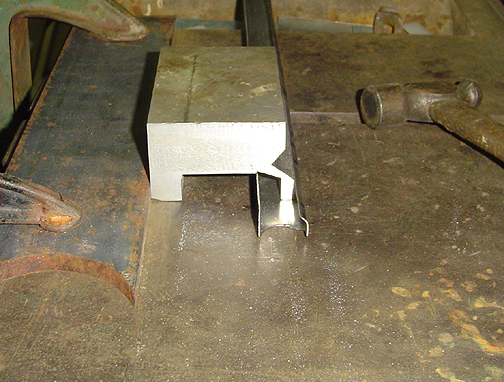
Here is how I made this bend. The picture below shows a special forming block I made from a scrap piece of aluminum block. It is about 4" long and 2" by 3" on the end. The hollowed out channel in the center and the forming edges were done on a Bridgeport milling machine:
The rib was moved a little, hammered, moved a little, hammered and so on until the whole edge was bent over as shown above. Now, flip it around the other way and do the other edge.
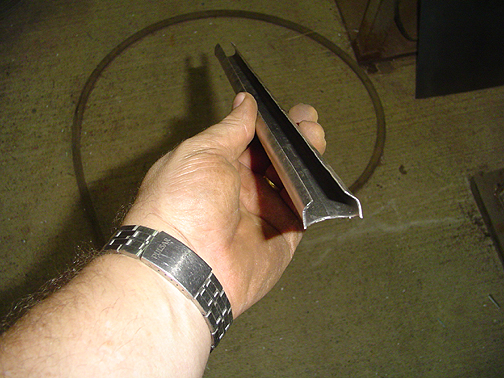
Here is the finished product with both sides formed:
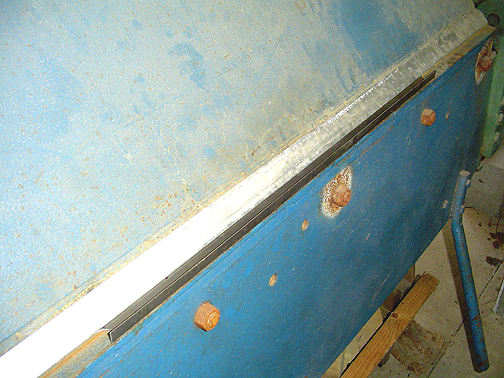
Again, you can see the notched ends and how they made the ribs fit exactly in the Horizontal Stabilizer:
As you can see, the ribs make a nice smooth transition to the tubes. This is important as any bumps will definitely show when the stabilizer is fabric covered and painted later.
Click here to go to Horizontal Stabilizer page 2
Click here to go back to the Horizontal Stabilizer page 1