Started December 4, 2004
The fuselage is made from 4130 N steel tubing (chromemolly) welded, then covered with fabric. This is years old, tried and true airplane construction that is not only reliable and durable, but also very safe. I like the fact that I am basically sitting inside a roll cage made from the same materials that Nascar roll cages are made from.
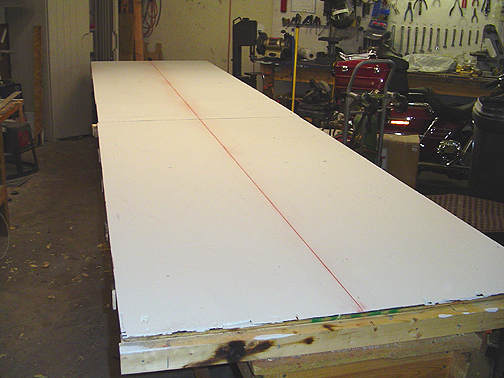
The first thing needed is a flat table, 4' wide by 18' long. This table must be flat and level (both side to side and lengthwise). Having the table flat and level will help greatly later on while trying to get everything square and plumb.
The top of the table was then painted flat white with some cheap latex house paint and a roller. This will allow me to see the lines easier and when I'm done with each part, I can re-paint the table top to get rid of the old lines and burn marks. Once the paint was dry, a chalk line was snapped down the middle of the table full length and it was then traced with a Sharpie marker and 4' straight edge. You could just spray over the chalk line with a spray can of clear poly-urethane but I didn't have any handy:
This centerline will serve as the centerline of the fuselage top and bottom frames and allow me to keep everything aligned properly.
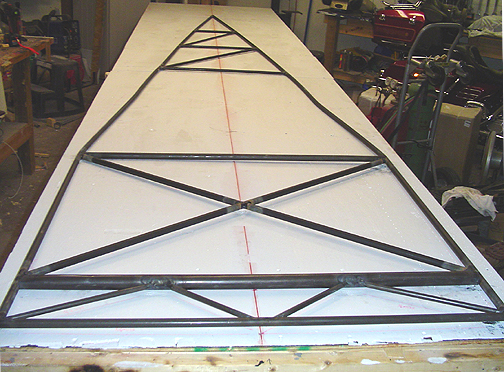
Fuselage Top Frame
First, all of the tube centerlines were drawn on to the table top, measuring from the table centerline, out to each tube. Each tube line was then marked for station location and each tube's diameter and thickness was marked alongside each line to make things easier.
Here is a picture of top fuselage frame tack welded in place:
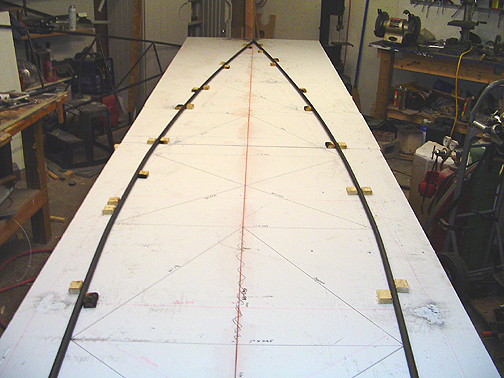
Fuselage Bottom Frame
All of the reinforcement blocks were pulled and the table was once again painted flat white, to cover up all of the old lines and burn marks. I left the previously drawn centerline untouched. Again, the fuselage Stations and Longerons as well as Diagonals were laid out on the table using a Sharpie Marker. I also penciled in all of the various tubing sizes and thicknesses as per the drawings.
Here is the bottom fuselage longerons, with reinforcing blocks to keep them from moving during the tack welding process:
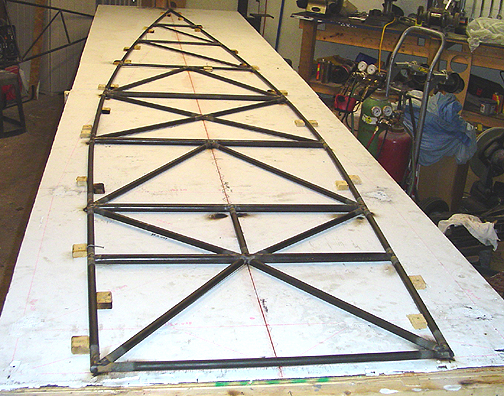
Now its time to put in all of the cross pieces and diagonals as per the plans.
Here is the completed bottom Fuselage Frame (just tack welded for now):
With the top and bottom fuselage frames tack welded, its time to jig the top frame over the bottom frame and start putting in the side pieces.
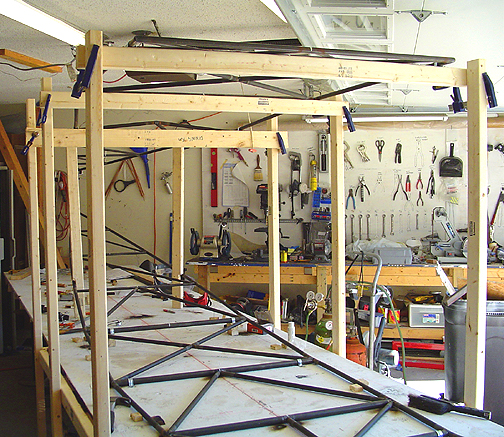
The Top Fuselage Frame was jigged in place, using some 2 x 3 lumber, attached to the sides of the construction table and to the floor. Here is a picture of the jigging frame:
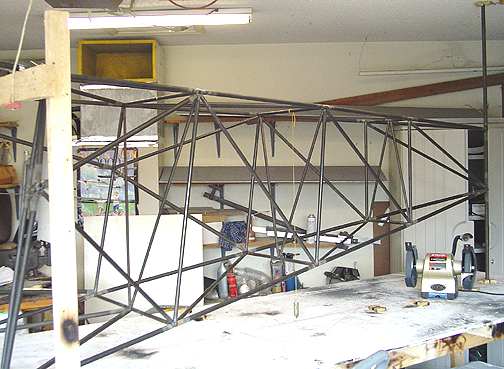
The remaining center "V" tubes meet at the center of each station through F/L. Here is the fuselage from the cabin compartment to the tailpost with diagonals in place:
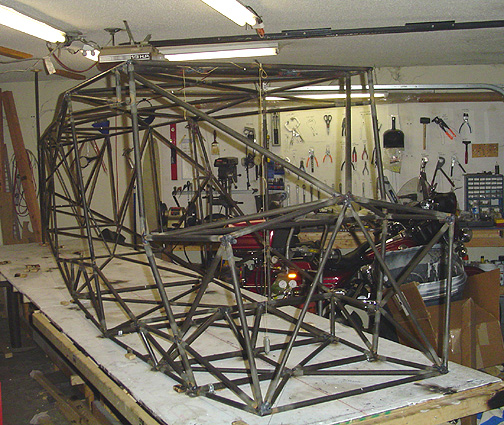
That's it for the fitting and tack welding. The fuselage is now almost ready for final welding. Here is the right side view looking aft:
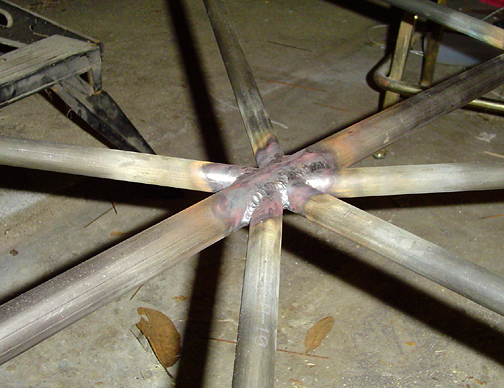
The cluster on the fuselage bottom, at the center of station "B":
Here is the author, welding away. This is what my wife has seen of
me for the past two weeks:
