Windshield page 1
Started June 23, 2007
I bought the windshield through
Avipro. I ended up going with
the solar grey, color tinted one. Most of my flying will be done during
the daylight hours and people who have the tinted windshield, say that night
flying is not an issue. The tinting is so light that it doesn't
matter at night and doesn't affect your vision at all. The windshield
comes coated on both sides with a protective plastic film. It is
recommended that you leave this film on for the entire installation
process, to protect the windshield from scratches.
If possible, it is best to have your wings mounted before you install the
windshield because at the top, it is shaped to flow into the wings and match
their shape. If you have the luxury of being in a hangar and you
can mount your wings, that's great. The shop that I'm working in doesn't
have that much room so I have taken an alternate route, making a wing template
for each wing, of the same size and positioned in the exact location that
the wings will be in, when mounted
Here are my templates of the leading edge section of each wing, mounted to
a piece of all-thread rod that is slid into the wing mounts on the
fuselage:
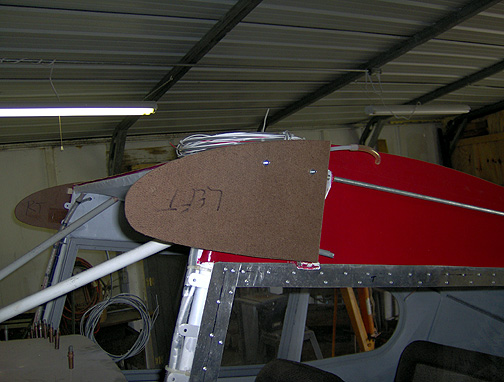
These templates exactly duplicate the size and position of the wing's leading
edge when it's mounted to the fuselage.
Now, we can take the windshield out of the box and put it in place to see
what kind of trimming is going to be needed. Here is the initial
fitting:

Note that the wing templates are being pushed out on each side. For
now, the windshield top is not place in the channel, its just laying on top
of it.
To cut the windshield, the best tool is an air die grinder fitted with a
thin cut-off wheel. It does an excellent job.
WARNING: DO NOT use a jig-saw
as this may cause little stress fractures that will later turn into large
cracks. Here I am making the initial cut:
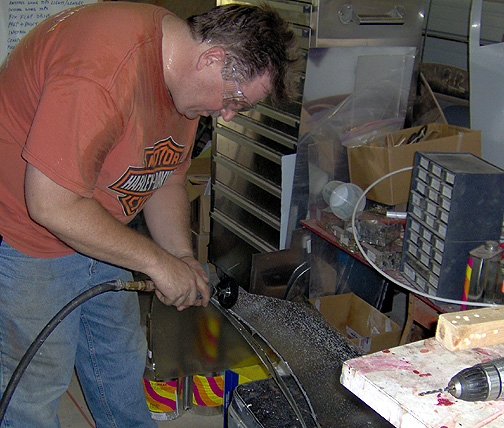
This scene in the above picture was re-created at least 20 times over the
next 6 or 7 hours as I whittled away at the windshield until it fit properly.
(note: it's 90 degrees and 90% humidity down here in Mississippi today -
sweatin' while building a Bearhawk, Life is good)
Here is the right side after about 6 rounds with the cut-off wheel:

The top of the windshield has a little lip that is designed to slide into
the channel at the top of the fuselage. Therefore you can do very little
trimming at the top. Almost all of the trimming is done at the bottom
where the windshield meets the boot cowl. Every time you trim a little more
off, the bottom of the windshield rotates back a little moving toward the
"V" support tubes. Keep trimming the bottom until the windshield is
about 1" in front of the "V" support tubes that run from the firewall
up to the top of the fuselage.
OK, it's time to trim the area where the wing intersection is, to allow the
wing templates to be inserted into the wing mounts. About 1 1/2" was taken
off.
Here it is at this point:
Looking good so far. Between making the wing templates and all the
trimming and fitting, this took up most of a full day.
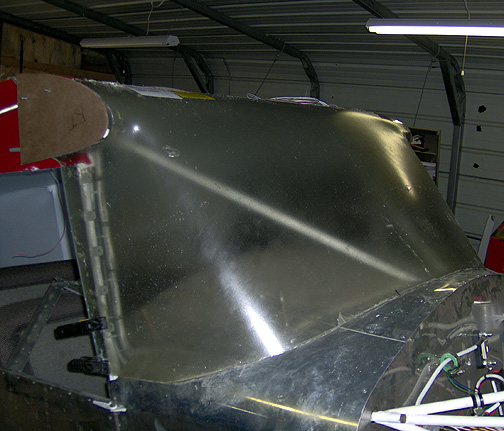
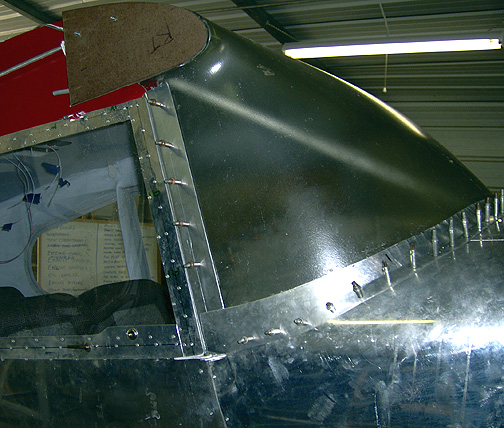
Wew decided to make the windshield faring out of aluminum (5052).
Here is the completed fairing at this point, fitting like a glove:
The marks left by the shrinker/stretcher will be mostly sanded out and the
primer will be built up a bit and then sanded smooth before painting.
Personal note: Making this aluminum fairing
was not easy. I had the benefit of Mickey Whittenburg's years of metal
forming experience and Mickey did most of the work (although I helped and
learned a lot as we went). If you are not fairly proficient with metal forming,
I would not recommend going this route. Just make it out of fiberglass
like everyone else is doing. However, if you can make it out of aluminum,
it is something to be proud of and is probably a bit lighter.
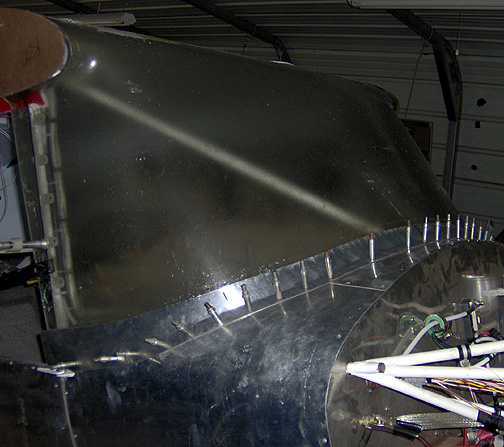
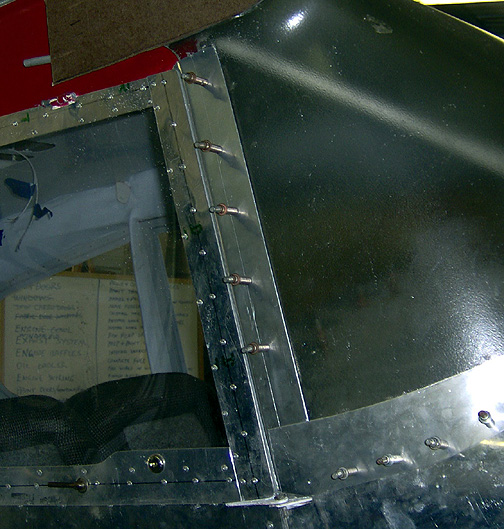
Now the piece can be trial fitted and you can do little trimming here and
there, as needed to get a good fit.. The side piece is slid into place
and aligned with the side window frame. The windshield and side cover piece
were then match drilled to the windshield mounting tabs
(previously welded on to vertical tubes) at the
sides of the windshield area.
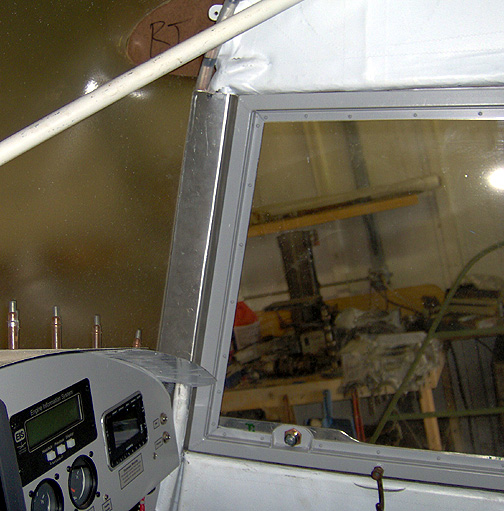
Here is the windshield side piece in position and the side window closed
against it to test the fit:
You can see what a nice, smooth transition we have from the windshield to
the side window.
Here is what the inside looks like:
As you can see, once this is painted to match the interior, it will give
a nice clean finished look that hides the fuel lines and wires.
Here is the completed windshield installation:
Now, everything will be removed, deburred and readied for primer.
Windshield Install
Completed: July 2, 2007
Total Time: 24 hours
Click here to go to the Final Assembly index
page
Click here to go to the Home page