Wentworth also sent me the traditional temperature gauge that you see in the pilot's side vent control of most cessnas.
Started September 30, 2007
I have elected to go with the same ventilation system that is used in most
of the smaller Cessnas. It is very efficient and fairly simple to install.
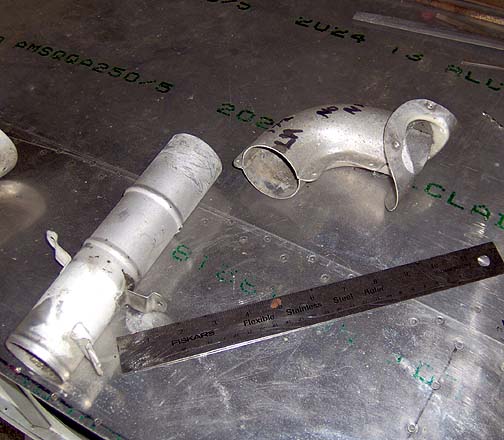
I started by contacting
Wentworth Aircraft Salvage
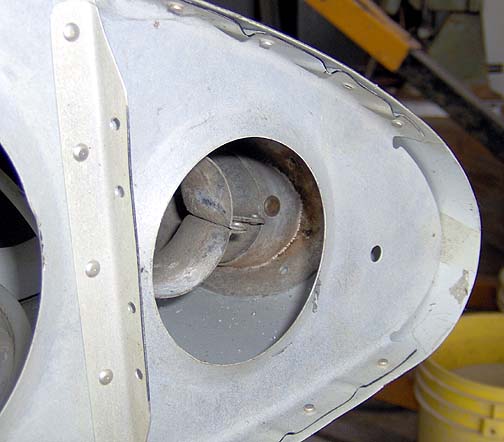
and bought a pair of vents from a wrecked Cessna 172. Here are some
of the parts that came:
Wentworth also sent me the traditional temperature gauge that you see in
the pilot's side vent control of most cessnas.
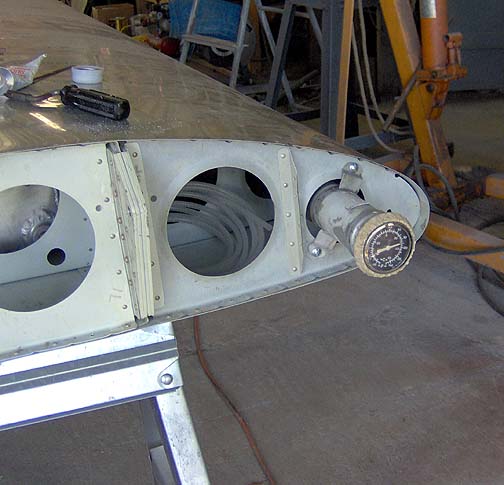
A hole must be cut in the root bay at the leading edge of the wing. The
instructions are shown in the July 1996 Bear-Tracks Newsletter. Here
is the template of the hole that must be cut:
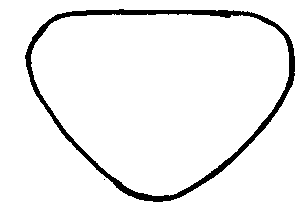
This hole has the following dimensions - Width = 1-3/4", Height = 1-1/4"
A template was made from poster board and then rough drawn on the leading
edge of the wing about 1 " inboard of the 2nd wing rib:
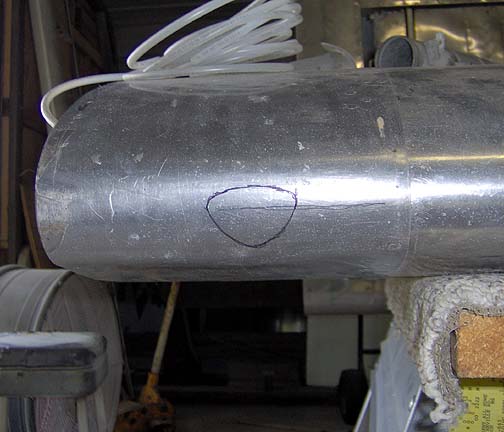
Note that the top of the hole will be just a bit above the centerline
of the leading edge. Most of the hole is under the centerline.
Once I had the rough shape drawn on the wing skin, I used a unibit to drill
three holes, one for each corner as shown here:
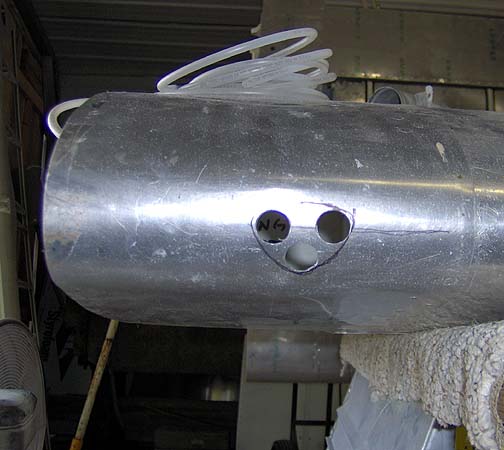
The material was removed between the holes and the hole was filed and smoothed
to this final shape:

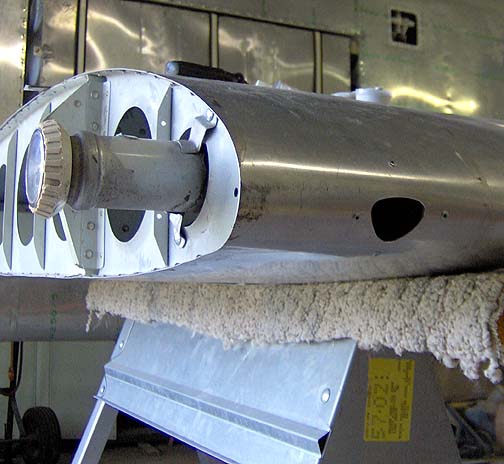
Now we can start installing the curved portion of the salvage wing vent.
The shape of the vent fits real well just as-is, but a slight amount
of tweaking was needed to get the vent to exit the center of the lightening
hole in the inboard nose rib. Here is the curved portion fitted to
the inside of the wing and clecoed in place for now:
Once I was happy with the fit, the piece was removed, holes were deburred and the flanges were de-greased. Then a thick layer of clear RTV was applied to the vent flange and it was pop riveted in place using stainless steel pop rivets for strength.
Next the straight pipe is installed. As it came from Wentworth, this
pipe was too long. If you look at the picture at the top of this page,
you will see that the straight pipe has two beads formed in it (and some
mounting lugs). I had to cut the pipe just inside the first bead and
it fit perfectly and allow the mounting lugs to come into contact with the
root nose rib as shown here:
As you can see, the straight pipe has a couple of mounting lugs on it and
these were simply attached to the nose rib with screws and nuts. I went ahead
and installed the vent control tube (with the temperature gauge in it) to
make sure everything works properly.
Here is the completed installation for now:
The knurled knob that came with the used Cessna vents is old and faded.
I will see what I can do about finding some replacements later on.
That's it for the vents for now. I plan to add some clear side window vents that turn to open and close, for the rear seat passengers. If anyone needs more air than what these vents can supply, we will simply open the windows :>)
![]() Come
back later for more. This page was last updated on September
30, 2007.
Come
back later for more. This page was last updated on September
30, 2007.
Click here to go to the Final Assembly Index page.
Click here to go to the Home page.