The rudder was then temporarily mounted and the location of this bushing was marked on the rudder spar. A similar bushing was then installed in the rudder spar.
Started April 18, 2006
Before sandblasting and priming the fuselage, there are a couple of more little detail items that I want to add. For one, I added some more tabs in the cabin ceiling area to accommodate dome lights. More on that in the electrical section.
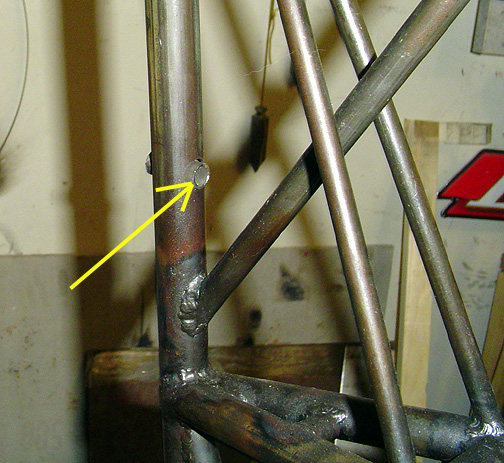
I also welded a 1/2" bushing in the tailpost to allow the rudder light wires
a place to pass through:
The rudder was then temporarily mounted and the location of this bushing
was marked on the rudder spar. A similar bushing was then installed
in the rudder spar.
Some brackets to mount the gascolator and fuel valve to were fabricated and
welded in place:
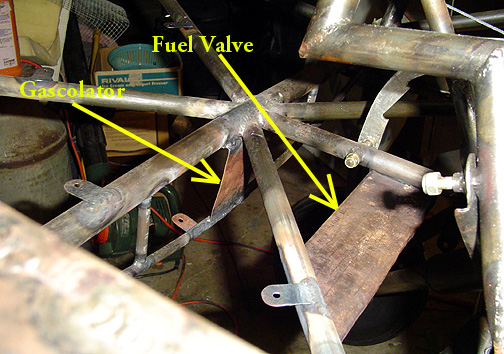
The brackets are made from .063 4130 N steel sheet. The one for the fuel valve has a 1/4" lip bent down on the edges for stiffness. As you can see in the above picture, I have decided to mount my fuel valve closer to the control stick assembly just to the left of the flap handle location. This will make fuel valve easier to reach than the location shown in the Bear-Tracks newsletter.
I also made a provision for a panel to mount my fuse blocks to. I wanted
easy access, so I'll mount the fuse blocks on a hinged panel that is located
on the right side inside wall next to where the passenger's leg will be,
just under the instrument panel. Here is a picture of the mounting
tabs for the hinges and camlock latches:
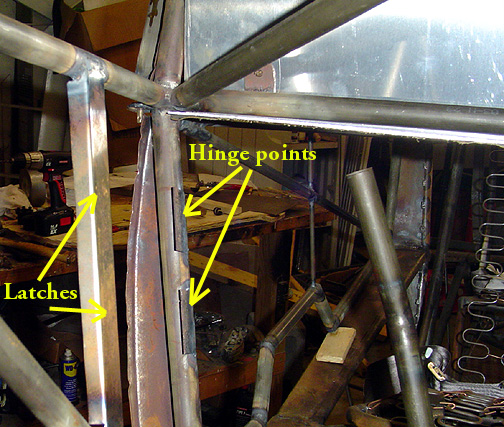
With this set up I can actually stand beside the airplane just inside the door and reach in, unlatch the panel, and swing it out where I can work on it. More on this in the electrical section.
The final small detail was the battery mount location. Since I'm installing
a Lycoming O-360 and fixed pitch prop, I will most likely need to have my
battery out on the firewall for weight & balance reasons. To make
a good ridged mount for the battery, I welded some .080" thick tabs on the
firewall tubes as shown below:
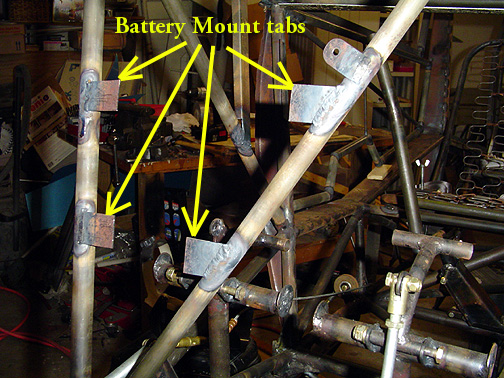
The corners on these tabs were rounded off later before priming.
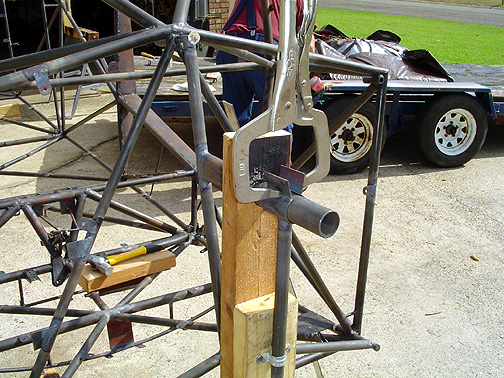
I decided to rig up a way to hold the fuselage and be able to rotate it at
any angle I wanted. This will make sandblasting and priming much easier.
Russ Erb showed an excellent set up in an addendum to his
Bearhawk Reference CD.
At the time of this writing, the addendum is shown at the bottom of
Russ' website.
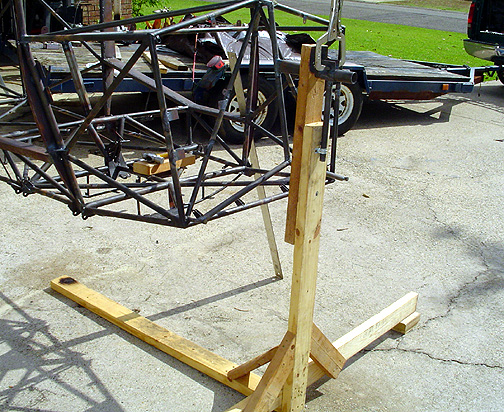
Here is my rendition of the setup. Here is the part at the aft end
of the fuselage:
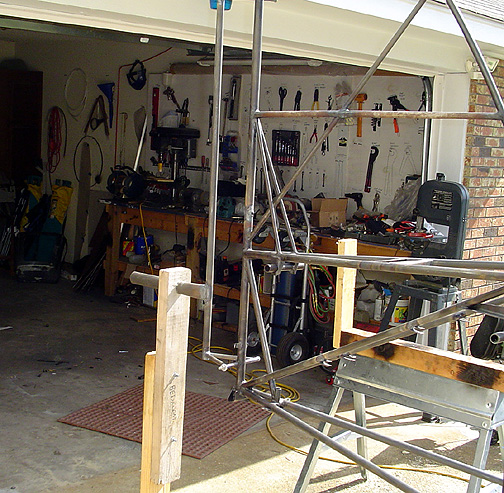
Here is the setup up at the firewall end:
Here is the braking system to hold the fuselage at any angle you choose: