Note: I had thought about using steel but decided to try aluminum first as it is lighter (and it's what I had with me at the hangar). If it cracks or doesn't hold up, I can easily make some out of steel in about an hour.
February 8, 2008
Some sort of device must be used to hold the windows in the open ("up") position. Most builders are making a clip attached to the wing bottom to accomplish this. I have seen several styles of clip used for this. Here is my version which is very easy and took me about an hour to make.
I noticed that when the window is the open ("up") position, the exterior handle for the window latch system comes close to the screws that hold the fuel tank cover in place. Therefore, I have decided to make some clips that will utilize two of the screws to help hold it in place. Makes it easy to replace should I need to in the future.
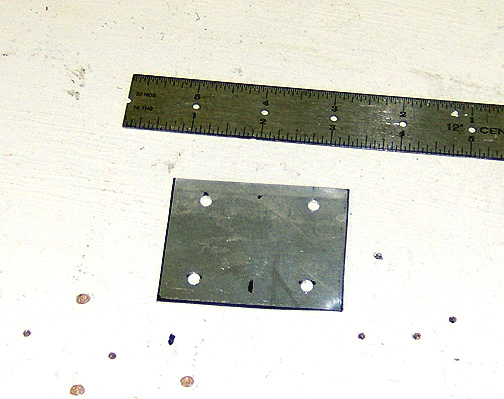
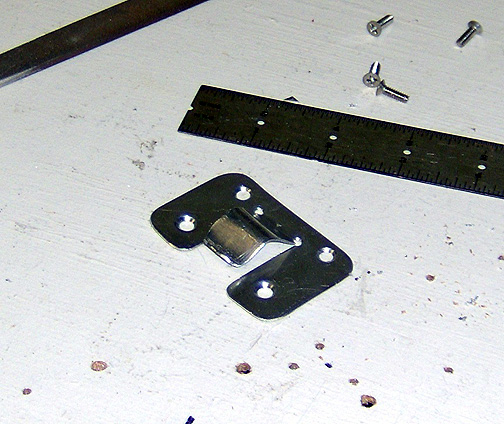
I started with a piece of .032 aluminum (2024T3) that is 2 1/2" x 2" and
drilled holes along the long edge that are the same spacing as the fuel cover
screws on the wing. I then drilled a couple of more on the other long
edge for a total of 4
holes:
Note: I had thought about using steel but decided to try aluminum first
as it is lighter (and it's what I had with me at the hangar). If it
cracks or doesn't hold up, I can easily make some out of steel in about an
hour.
The piece was then screwed to the fuel tank cover under the wing and the window was then placed in the up position to determine exactly where the handle would come in contact with the clip. A line was drawn to to show the window latch handle position and location.
With the location noted, the piece was removed from the wing. A couple
of relief holes (#40) were drilled and a tab was cut as shown
below:
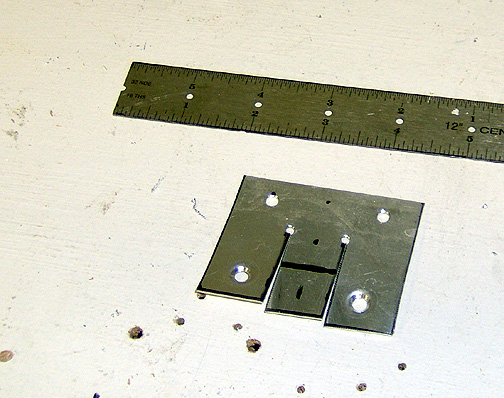
The line across the tab represents where the window latch handle hits the
clip.
Now using a pair of pliers with the teeth ground smooth (homemade seaming
pliers) the tab was bent up at relief
holes:
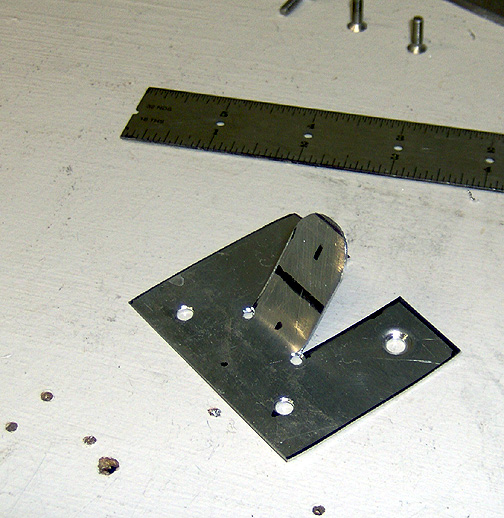
This is the time to go ahead and shape and smooth the edges of the tab with a file and some sandpaper. Note that the end has been rounded off. This will allow the window latch handle to enter the clip easier.
Once the sides were smoothed, the tab was reshaped with the seaming pliers.
It was first bent down at the reference line, then bent back up at the very
tip as shown here:
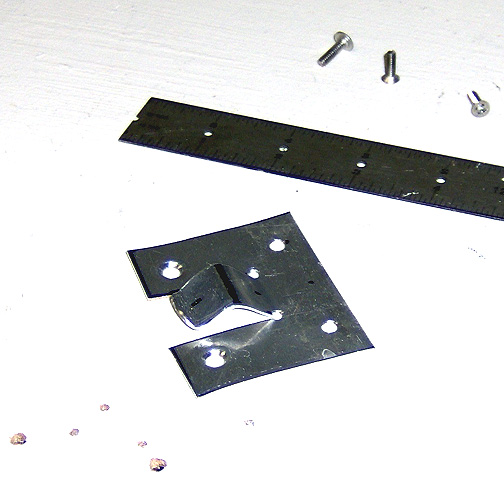
At this point I noticed that the clip was a little bigger than it needed
to be so the 2" side was cut down to make the clip 1 1/2" x 2 1/2"
and the two holes were re-drilled. All of the corners were rounded
and the edges were all smoothed with a file and some sandpaper, to a nice
smooth edge, removing all tool
marks:
The holes were countersunk to accept flush head screws.
Here is the clip mounted under the
wing:
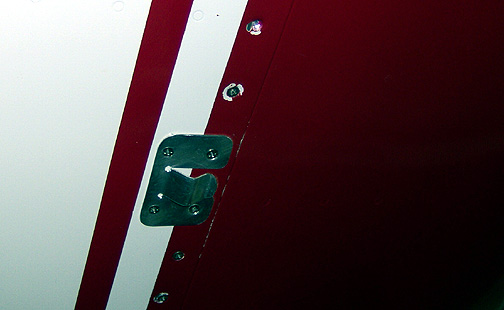
The tank cover received a couple of platenuts for the other two screws. The
screws caused my paint to chip around the holes. I'll use a little
touch up paint there later.
Here it is with the window in the up and latched
position:
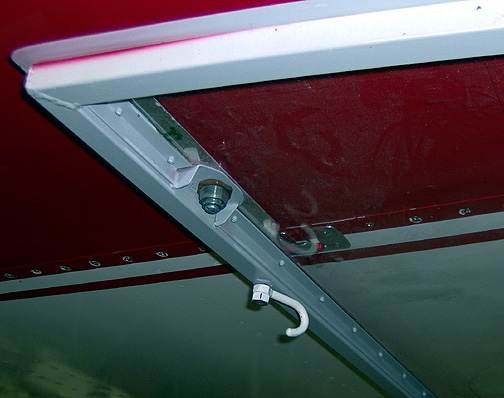
The latch clip was positioned so that when you pull the hook toward you,
it releases from the clip and you can just pull the window shut. Had
I turned the clip around the other direction, you have to push the hook away
from you (when seated in the airplane) to release it from the clip.
These will be removed and primed/painted then re-installed
Window Latch Clip
Completed: February 8, 2008
Total Time: 1 hour