
I will cover the aluminum brake line later with firesleeve for safety reasons.
Started February 15, 2007
Like so many other things in the homebuilt aircraft world, the builder has many choices when it comes to the brake system. There is single puck, or double puck wheel brakes. There is pilot's side only brake pedals, or you can opt for dual brake pedals (pilot and passenger side). You can mount the reservoir on the engine side of the firewall, on the cabin side of the firewall, or on top of the master cylinders.
Here is my system:
First, I opted to mount my reservoir on the engine side of the firewall.
I figure its easier to check and to add brake fluid there. As I get
older and less limber, I really didn't want to be crawling around under
the instrument panel trying to check or fill my brake fluid. I
also mounted it high enough to be the highest point in the brake system.
It feeds via a tube to a steel "L" fitting with pipe threads.
I will cover the aluminum brake line later with firesleeve for safety
reasons.
The picture below shows the entire brake system on the cabin side of the
firewall (see detailed explanation below)
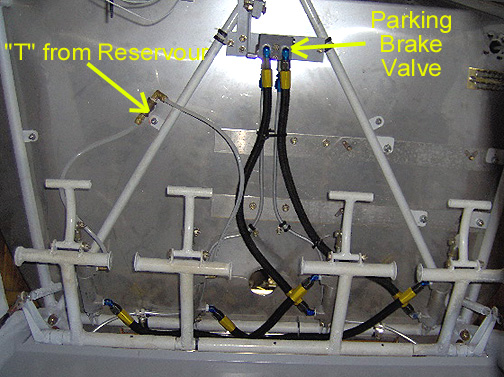
Its kind of hard to see the hoses running from the bottoms of the pilot's
brakes to the tops of the passenger's brakes because they are behind the
rudder pedal cross tube.
Here is the set up as shown above:
1. 1/4" Nylaflow tubing runs from the reservoir "T" fitting to the top of
each master cylinder on the pilot's side.
2. Aeroquip 303-4 hoses run from the bottom of each master cylinder on the
pilot's side to the top of each master cylinder on the passenger's side (left
to left and right to right).
3. Aeroquip 303-4 hoses from the bottom of each passenger's side master cylinder
to the inlets on the parking brake valve.
4. 1/4" aluminum tube from the outlets on the parking brake valve to the
top of each landing gear.
At the top of each landing gear, the aluminum tube ends and a piece of Aeroquip
303-4 hose makes the transition to the bulkhead fitting at the top of the
landing gear legs as shown here:
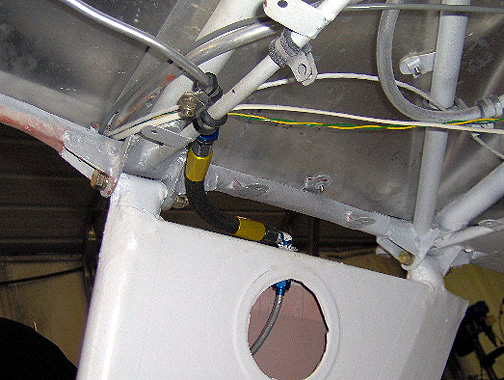
This is a movement point so you have to transition to a flexible tube as
shown.
Before the gear legs were covered with fabric, 1/4" aluminum tube was run
as shown below with a 90 degree bulkhead fitting at the top of the gear
leg.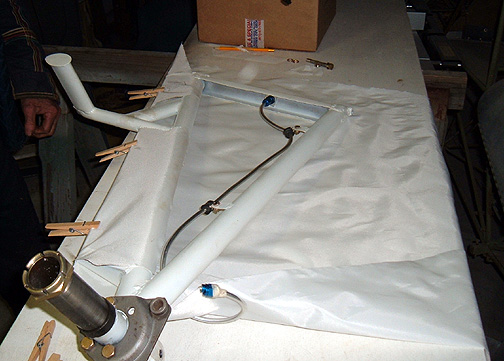
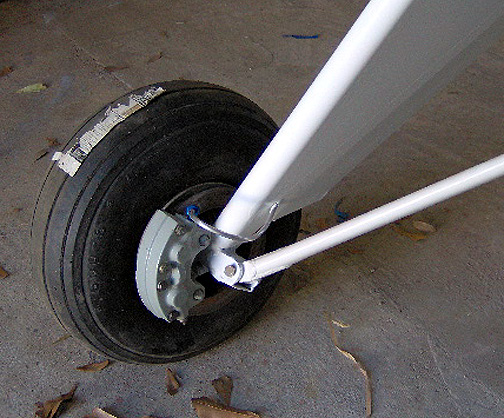
The bottom the gear leg where the axle meets the gear legs has very little
movement, so you can just put a loop in the aluminum tube as shown here to
account for that small movement:
Well that's it for the brake lines. All that is left to do is to fill and bleed the brakes. I fill them from the bottom up using pressure to drive the brake fluid up into each tube and cylinder and finally into the reservoir. Doing it from the bottom up drives out all those nasty air bubbles.
Here is my set-up for bleeding the brakes:
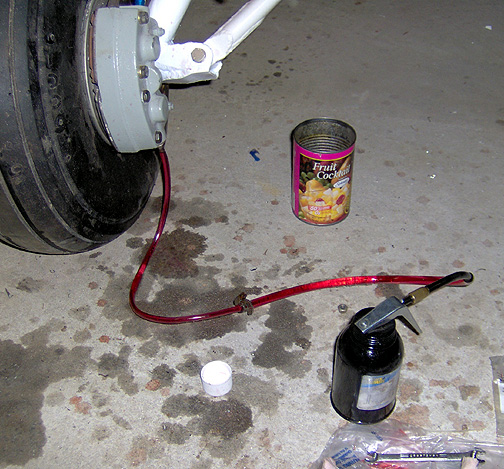
Its a oil can pump with some clear tubing. Use the aviation quality
brake fluid that Aircraft Spruce sells. I opened the little valve nut
at the bottom, slipped on the hose and pumped the brake fluid up until it
the clear Nylaflow tubing at the top of the brake master cylinders start
to turn pink. Switch to the other side and do the same.
Here are the nylaflow tubes up near the reservoir:
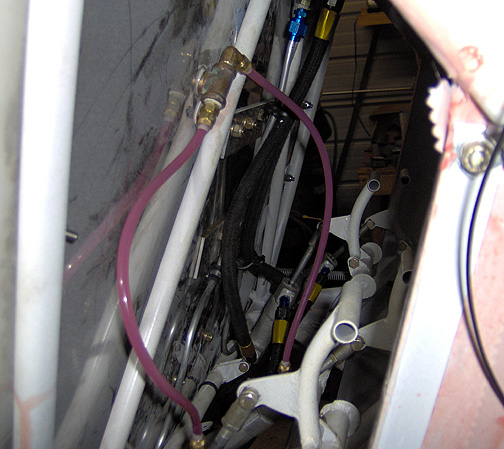
As you can see, nice and pink. You will see some air bubble traveling
up these tubes. Let them go up and out the reservoir. Watch the
reservoir as you pump from the bottom up to make sure it doesn't overflow.
I did have a stubborn air bubble that wouldn't come out. You can tell you have an air bubble because the brakes are spongy and have to be pumped up to work. I suspected that my air bubble was up near the parking brake since my design caused a high point in the system there. We closed the parking brake valve, then while holding some pressure on the brake pedals and we loosened the fittings at the parking brake valve and let the air out until fluid squirted out. That seems to have fixed the problem because I now have good brakes.
That's it, the brakes are done except for hooking up the parking brake cable.
Brake Lines
Completed: March 5, 2007
Total Time: 16 hours
Click here to go to the Home page