This baffle kit is very well done and comes with everything needed including the rivets and screws. The instructions are a little on the weak side but if you have come this far building your Bearhawk, you can easily figure this out.
Started: March 11, 2008
Baffles are required for any air cooled engine installation. The baffles create a separation between the top of the engine and the bottom. Cooling air then enters through inlets in the nose bowl, creating a high pressure area on top of the engine. Since the cool air has no where else to go, it is forced down through the cooling fins around the engine cylinders and the heated air exits out the bottom aft side of the cowl (the tunnel). It is important that the baffles fit snugly and that the only path for the air, is to go through the cylinder fins. Any loose fitting or leaky baffles will affect the engine cooling and will cause lots of overheating problems.
I have decided to save a lot of time and effort by going with the Baffle kit ($250 at the time of this writing) from Van's Aircraft. My engine is a Bob Barrows O-360 EXP. Bob makes this engine using IO-360 cylinder assemblies and case halves. Therefore, I ordered the IO-360 baffle kit from Van's. The kit is not a perfect fit for the Bearhawk but is a good starting point. It does require some alteration to properly fit the Bearhawk cowling.
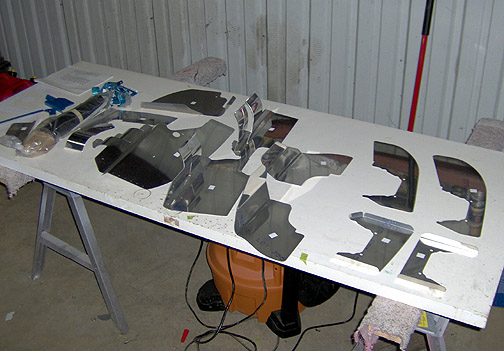
Here is the Van's Baffle Kit as it comes out of the box:
This baffle kit is very well done and comes with everything needed including
the rivets and screws. The instructions are a little on the weak side
but if you have come this far building your Bearhawk, you can easily figure
this out.
The baffles, as they come from Van's, are oversized height-wise. This allows you to trim them to perfectly fit your engine cowling. The baffles near the nose bowl were undersized a bit and you have to add a little bit to them for a proper fit.
We will start by installing the side and rear baffles first, and then trim them to fit the engine cowling. Then the forward baffles will be fitted to size.
Each baffle piece is attached to the engine with braces and/or is bolted
directly in place. I started by drilling, deburring and riveting
the reinforcement pieces to the side baffles:

The baffles are subjected to a lot of vibration, so it is very
important that all edges be thoroughly smoothed to prevent cracking.
Any tooling marks left behind, will become a crack later on.
The right rear baffle was then drilled and clecoed to the side baffle using
the pre-punched holes:
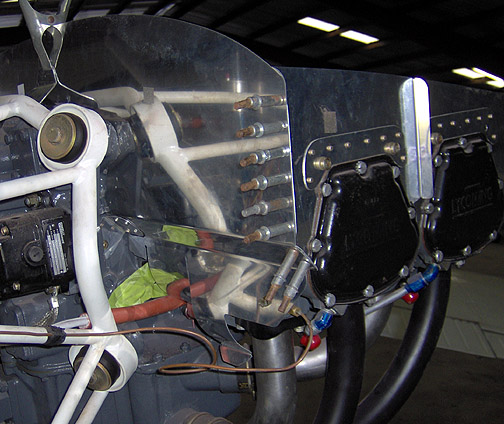
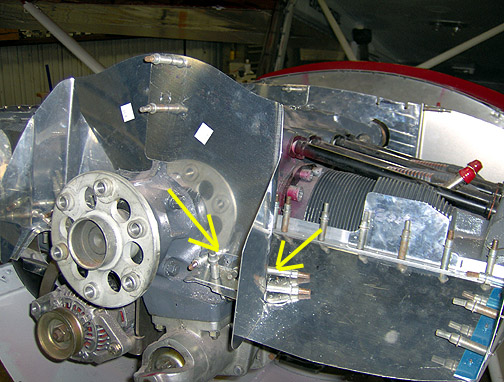
Here is a picture from the front, showing the left rear baffles in place.
The arrow points at the hole for the engine mount where I'll need to
cover that hole with some baffle seal material:
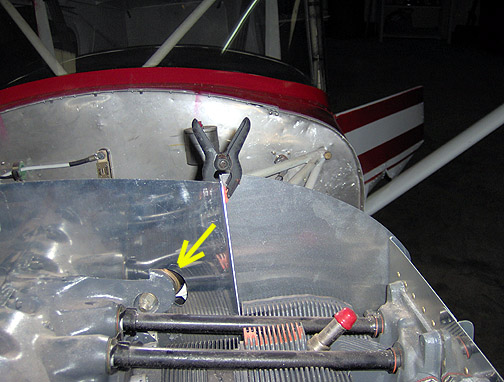
There will be some rivets in the area where the clamp is.
Here is the right front floor clecoed in place:
Here you can see the angle brackets that attach the front baffles to the
floors:
This why you need to make sure the floors are bent down enough to clear
the bottom of the air inlets on the nose bowl before you install this part
of the system. Once you install these brackets and the ones attaching
the floors to the side baffles, the floors are locked in position.
Here are the rear baffles with the fabric riveted on:
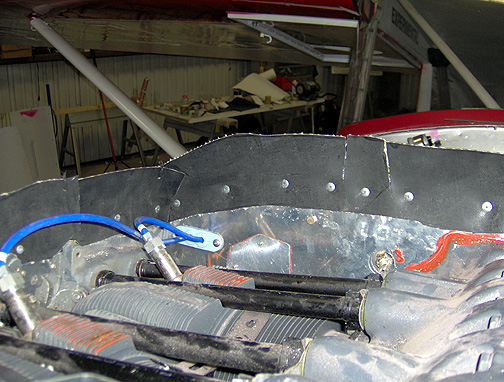
The splits in the fabric are to allow for the "C" channel of the top cowling.
Note that the baffle material is installed with the natural curve facing
inward.
Fabric seals were installed inside the nose bowl inlets.
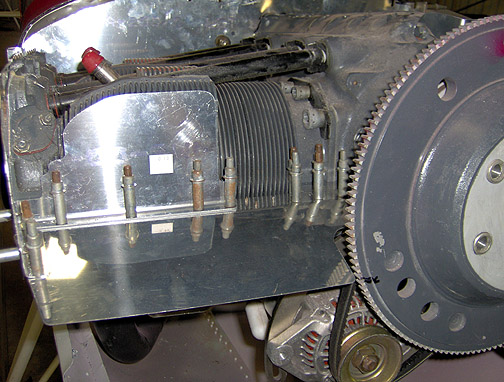
When installed, these fabric baffle seal strips simply lay on top of the
floor and against the side pieces near the flywheel area:
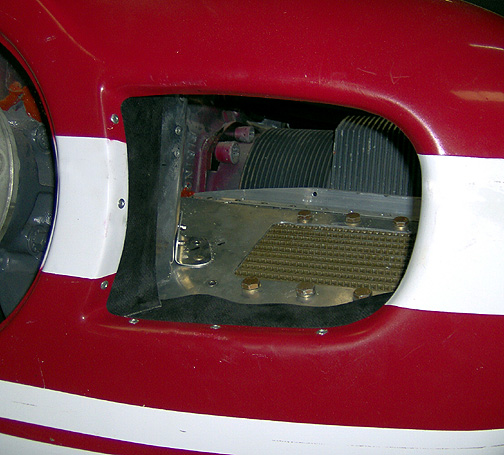
The seal strips are not attached to the baffle floor. They simply lay
on top of it, and when under air pressure they will be pressed down against
the floor creating a tight seal. Installing them this way allows for
engine movement but creates a nice seal at the same time.
That's it for the baffles.
Baffles
Completed: April 12, 2008
Total Time: 24 hours
Click here to go to the Firewall Forward index page
Click here to go to the Home page