
Note: The first time around, I skipped the above step and ended up with a leaky strut. When I took it back apart, I found an "O" ring had been cut in half. I ended up buying new ones again from Bob Barrows and re-doing it.
October 5, 2006
After sandblasting and priming of the shock struts, the final assembly can be done. Be sure all of the sand from sandblasting has been thoroughly cleaned out of the shock strut tube.
Before beginning final assembly it is VERY important that you
carefully smooth all of the edges of the ring grooves with some emory
cloth:
Note: The first time around, I skipped the above step and ended up with
a leaky strut. When I took it back apart, I found an "O" ring had been
cut in half. I ended up buying new ones again from Bob Barrows and
re-doing it.
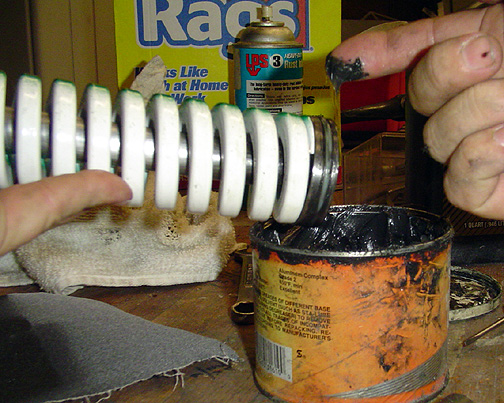
Assemble the "O" rings into the grooves in the pistons and the bronze caps.
Next, Use some grease to lube up all of the "O" rings.
The spring must be compressed in order to get the snap ring in place. The
best way to do this is with a 3/4" socket (1/2" drive), some washers and
a bolt as shown below:
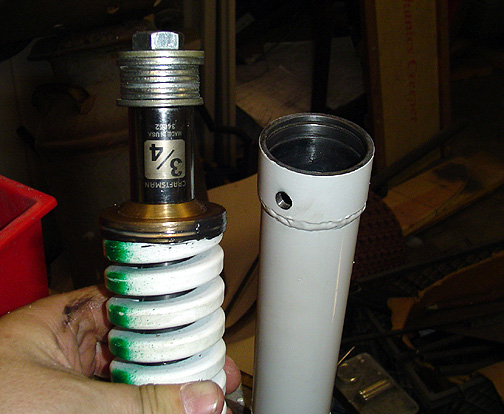
Compress the spring just enough so that when the assembly is slipped into the shock strut housing, the groove for the snap ring is clear.
Carefully slide the assembly inside the shock strut housing paying close
attention that you don't catch an "O" ring and cut it in half:
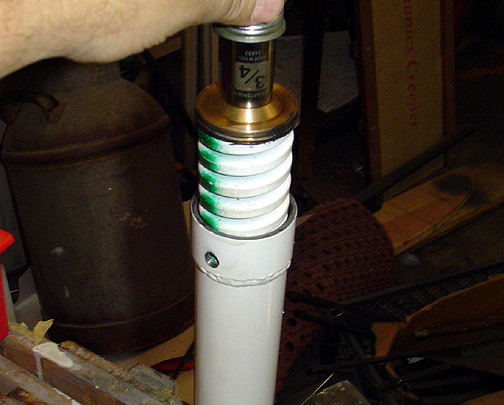
Then use some top quality snap ring pliers to slip the snap ring in place. Make sure to look in the fill hole on the side of the shock strut to assure the spring is not blocking the hole. If it is, simply rotate the assembly before releasing the pressure off the bolt/socket. It is very important that the snap ring be fully engaged in the groove before releasing the bolt and socket.
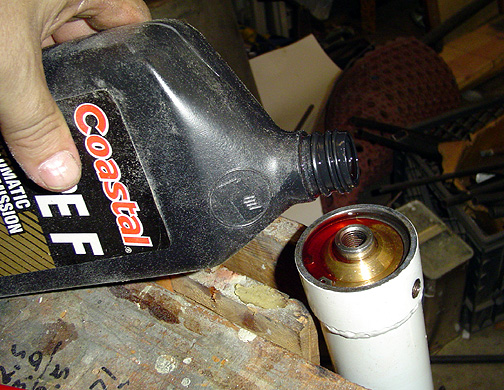
After releasing the spring pressure and removing the bolt/socket you can
fill the shock strut all the way up with ATF (Automatic Transmission Fluid).
I found it easiest to simply pour the ATF into the hole for the Rod End Bearing. Tilt the shock strut assembly so that the
fill hole is as high as possible to get the strut as full as
possible before it starts running out of the fill hole:
With strut full of ATF, you can assemble the rod end bearing. Note
that these are the new Rod End Bearings that Bob recommends and came out
in an Engineering Notice. These are available from
Avipro and do not have the
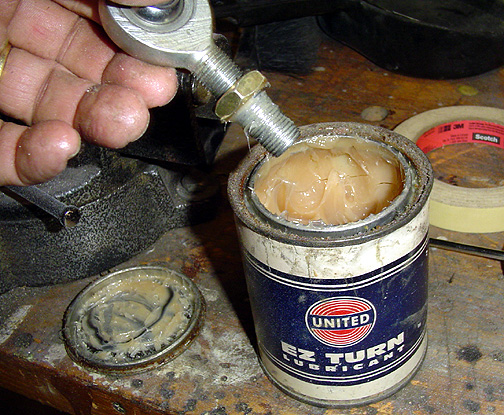
grease fitting like the old ones did. Before assembling the rod end bearing,
coat the threads with some sort of sealer like Fuel Lube or EZ Turn as shown
below:
With the shock struts fully assembled, check them for leaks by laying them
flat on the table and letting them sit overnight.
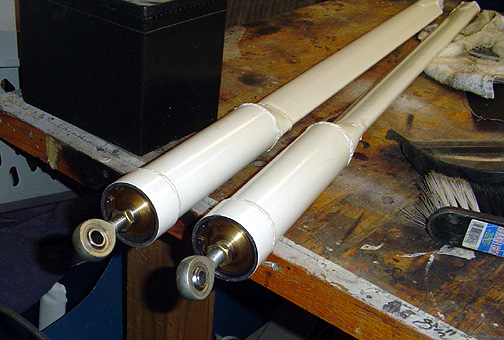
If you have a pool of red ATF on the floor the next morning, you have a leak. Take them apart and start over.
The rod ends are threaded in 3/4" for now. They will be final adjusted when the airplane is completed and at its final weight. At that point, they can be adjusted until the center of the tire treads are exactly 72" apart as shown in the plans.
Shock Struts Final Assembly
Completed: October 5, 2006
Total Time: 2 hours
Click here to go back to the Home Page